Printing Holme Fen: Rising Mist
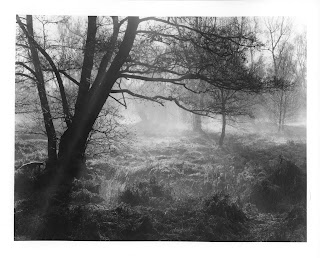
I recently took this photo on HP5+ 4x5 film with my Intrepid large format camera. I thought this would be a difficult negative to print given the range of light and texture. However, it was fairly straightforward.
 |
| Blog Post Cover Image |
Started out with a matrix test print. I seem to try different test print/strip strategies. Sometimes I run small strips for each filter (hard and soft). Sometimes the Les McClean method of soft then overlay hard test strip on a print with the best soft filter choice base. They each have their strengths and weaknesses.
 |
| Matrix Test f32 (Scan7) Soft (#00) right to left 8-64" 1/2 stop intervals Hard (#5) bottom to top 8-64" 1/2 stop intervals |
In this case the variation light makes this matrix print difficult to judge. For the soft filter I am looking for the right level of white tones. I can usually count on the hard filter to not impact highlights until the longest exposures. So I know the bottom horizontal strips are mostly soft filter highlight tones. I judged 22" as the right exposure. Because the scene has such a range of tones I decided I would use the #00 22" base exposure and run a McClean-style test print with the hard filter.
 |
| Hard filter f32 (Scan3) #00 22" #5 right to left 8-64" 1/2 stop intervals |
 |
| f32 #00 22" #5 22" (Scan4) |
 |
| f32 #00 22" #5 32" (Scan5) |
When deciding between these two I see the foreground bracken shadows block up too much and lack detail. So although I like the darker tree trunks 32" I opt for the lower value of 22" knowing I can burn back anything I need on top of this.
Now with my first straight prints in hand I can see the areas where the tonal range doesn't stack up right. The challenge of this image is the sun is just behind the main tree trunk near the top of the image. This leads to that sunbeam that tracks the length of the tree trunk from the split in the upper part of the trunk to the ground. This light illuminates the air around it and lowers the contrast and darkness of the tree trunk.
Aesthetically I feel a conflict between maximizing local contrast here and realizing this is exactly how the scene is lit. Because of there the sun is the whole upper edge of the image is brighter than the bottom and so lack balance in terms of local contrast. So, my first correction is to add more tone to the top third of the image concentrating more towards the top. I take on faith that I will not lose the sun glow as the negative is extremely dense in the vicinity of the sun.
 |
| f32 #00 22" #5 22" (Scan8) #00 burn top third 22" |
This helps a lot. Now I think more about the overall contrast. First the highlights in the center could use some more brightness. I dial down the soft filter 1/2 stop from 22" to 16". This might be too much, but the hard filter has added some tone to the highlights and I need to brighten the highlights without impacting the shadows.
 |
| f32 #00 16" #5 22" (Scan1) #00 burn top third 22" |
 |
| Burn Plan |
I also see the triangle formed in the upper left corner by the slanting tree trunk could use some more hard filter and perhaps the upper right quadrant.
I tried two different ammounts of burn to the same plan. The first I intentionally wen 'too far' in the word of David Kachels but it really was too far.
 |
| f32 #00 16" #5 22" (Scan6) #00 burn top third 22" Burn upper left corner 64" Burn upper left quadrant 45" |
The upper left corner trees look artificially darker while the upper right quadrant is also too dark. A better and final result came from the following burn plan.
 |
| Final Print Burn Plan |
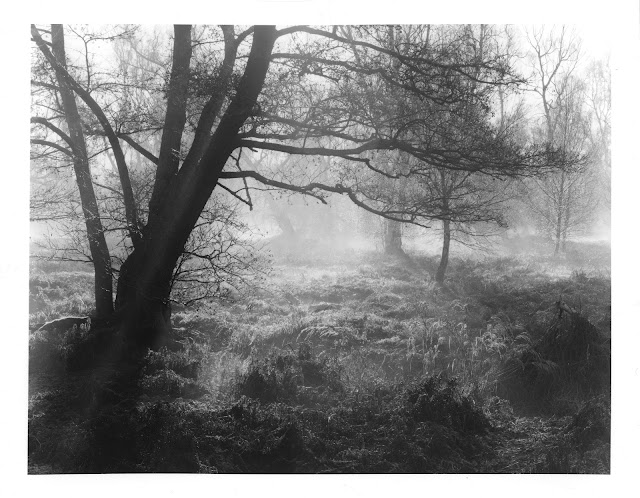
 |
| Final Print |
Next it is time to explore how this print works with lith development. I find it helps my lith development if I learn the print with conventional development first. This allows me to know what the burn plan should be to give me even development across the print. The infectious development means the shadows must be close together in terms of exposure if it is to proceed evenly across the print.
Comments