Posts

Showing posts with the label Fotospeed Lith Paper

2023 First Darkroom Work (Part 2): Gradient and Selective Toning

Image
The next phase of any lith printing I do tends to be toning. I never feel in control of my toning, but I manage to stumble into some interesting images as a result. Today I played with some sepia and gold toning but didn't really get anything I liked. I moved onto selenium toning as there can be some rather intense results.  Blog Post Thumbnail Image I use a 1+3 dilution of selenium which always results in strong color changes. For most of my lith the end point (to completion) of selenium toning is a rusty red almost strong sepia tone as seen below.  Wistow ORWO f11 23 sec burn sky 45 sec toned On the way to this color, it passes through a cooler almost purple tone. This led me to think about getting a combination of tones though selective toning. I have done this before, and it works well for images with a strong line like a horizon. I dip the wet print only up to the point I want toned. I try and be careful about where the toner goes. The toner effect can lag quite a bit in ...

2023 First Darkroom Work (Part 1)

Image
After much upheaval in my personal life living a semi-nomadic existence in the USA and UK I have not been in the darkroom for some time. My last effort was at the very end of May just before my move to the USA. I am back in the UK for Christmas and New Years and found some time to do some lith printing. I had to look through the back catalog to find some subjects to print.  Lith Printing Recap In many ways lith printing is easier than conventional printing. The exposure is not critical, and I learned some important techniques back in 2021 that made lith finally click for me. For instance, I meter the exposure on the easel at Ev 4 (ISO 100) in the highlight areas of the image using an incident light meter. This corresponds to about 45 seconds of exposure. I usually bracket this +/-1 stop to start with. Burning helps a lot to balance the exposure on the print. Any sky wants a stop or 2 of burn to bring the tones in line with the foreground.  I also crop out areas that are too ...

Lith Printing Foggy Oak: Day Two

Image
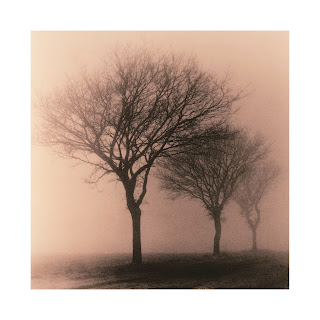
So I followed up this morning on my successful run yesterday. I started out with Fotospeed lith paper and exposed 2 sheets at f8 for 64 seconds dodging the dark portion as yesterday for 32 seconds. My previous notes indicate Fotospeed likes more light so I opened the aperture 2 stops.  The first image caught infectious develop on the edges of the tree and many of the highlights did not catch up. Not great and a testimony to the instability of the process. I think perhaps less exposure is in order.  Fotospeed Paper (f8 64 seconds, dodge tree/lower right corner 32 seconds) The next print came out much better despite being almost identical. Again fairly dark so less exposure by a stop if I decide to try this again. The lovely warm salmon tones are present that makes the paper so wonderful to lith (I am now down to 4x 8x10 sheets!) I like this one.  Fotospeed Paper (f8 64 seconds, dodge tree/lower right corner 32 seconds) For the next set I made two identical exposures on Or...

Print Journey Part V-Foggy Path in Aversley Wood

Image
Finally I will explore this image in Lith developer. Lith can be very slow and frustrating but my earlier experience with low contrast images showed some real potential to create a new image. I mostly have 8x10 lith paper (Oriental Seagull) so I will have to opt for smaller images but I will stay with a 16:9 aspect ratio as it suites this image so well. This time I will go for 9x5 on 8x10 paper which is nearly the same ratio (1.8 vs 1.78 for 16:9).  I reviewed my prior posts on lith developing here and here . I then made some notes based on results for Oriental Seagull.  60W lamp 0xND filters No filtration 9x5 image on 8x10 paper Reference point f4 at Ev 2.6 in fog from earlier print Reference point f5.6 @ 45" with 1/2 stop burn where needed 30g Part A Fotospeed Lith 33g Part B Fotospeed Lith I then setup the the enlarger, easel and focus. I found I got Ev 2.5 in a foggy area at f5.6 to match as close as I could what I had done before. I mixed the developer by throwing out hal...

Mathematical Trees Study 2: More time in the Lith Rabbit Hole!

Image
After my first images in this series resulted in extended time re-connecting with Lith development I finally moved on to image 2 of the Mathematical Trees series. One comment by Sergio on this blog mentioned the idea of formalism that I think is correct. I am going through a deliberate process to view these images in different ways. While formal I am also allowing serendipity to play a role where mistakes and impulses can contribute.  Blog post cover photo This second image was the same trio of trees but taken from the left side. This vantage meant the sun was behind me and the gradient of light across the image is not so apparent. This could make printing easier. I started with an initial square crop but found that cramped and liked the rectangular crop more where the eye is allowed to follow the line the trees make.  Again I am working with lith developer. I started out with the Oriental Seagull paper I used in the last set. I have almost 300 sheets of it so I can use it to ...

Printing Mathematical Trees Study: Lith Developer

Image
This is the second in the series exploring the images from a study I did on some trees in the Cambridgeshire countryside. This post contains a lot of detail notes of the process a more readable summary of the  project is here . Blog Post Cover Image This time I am looking to lith developer to see if I can improve contrast. I have a love/hate relationship with lith as I have found it very difficult to get consistent results. This is often what makes it attractive to others however. I also don't like the long development times and in the past resorted to  heating the developer .  Never-the-less I embarked on this branch of the journey of these prints with such low contrast.  I found the results so good at one point that I kept venturing deeper into lith territory. I found the rewards of  persistence and research.  Lith Prints I mixed up a batch of Fotospeed Lith developer 15ml+485ml water for each part A and part B per instructions.  I started out with t...