Film from Digital (Part 3 Gammatech Results)
This is a continuation of a series of posts on this subject, Part 1 and Part 2 links.
I am back in the UK now and have started to look again at my 'film from digital' project. I have also received the images from Bayeaux in London.
Bayeaux had some trouble with their Kodak LVT equipment but finally sent me my images. For some reason they ended up taking my nominal 4x5 images and printed them 3-up on a single sheet of 8x10 film. I am not sure why they did it this way. Did they have trouble with 4x5 film availability or printing on 4x5 film. Also, why 3 identical images? Not sure but I got what I paid for so no complaints as far as that is concerned. Initial inspection indicates the negatives may be slightly denser than Gammatech but certainly look printable.
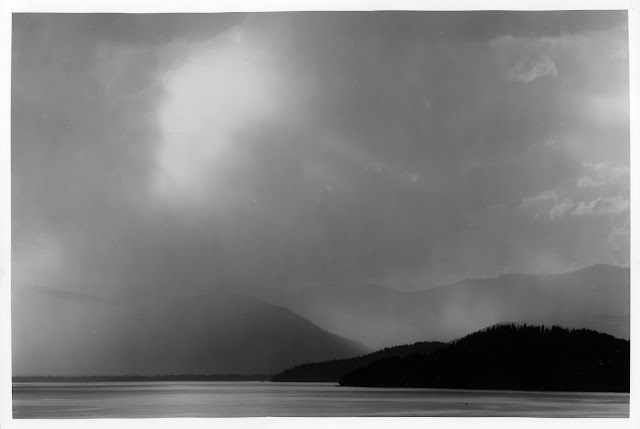
The first negative I took to the darkroom was the one shown below from Gammatech. This is the monochrome version of the image I framed last week described in this post.
 |
| Blog Post Cover Image |
I decided to start with a contact print in my downstairs darkroom. I ran some test images and made a contact print on some Ilford MGIV FB paper scraps. This print turned out pretty well. The exposure was set at f16 which gave an Ev of 2.8 on the baseboard from the light source. I used the hard filter at 16 seconds and the soft filter at 8 seconds.
 |
| Test contact Print: Hard filter right to left. Soft filter bottom to top. |
 |
| Soft filter contact test print. |
 |
| First Contact Print (8" #00 filter 16" #5 filter) |
I then moved upstairs to 'The Beast' 4x5 enlarger and set up a 19" x 14 1/4" print on the same paper. For the first print I used contact print parameters. So, I set the setup the enlarger and frames and focused the image on the easel board. I then removed the negative and set the aperture so that the Ev on the baseboard was the same as the contact print Ev 2.8. I then used the same exposure parameters of soft filter at 8 seconds and hard filter at 16 seconds. This resulted in a good first print. Some dust I then cleaned up on the negative. (These scans are done in four sections and stitched so there is some distortion due to the process.)
 |
| Scan004_stitch f22 #008 sec #5 16 sec |
I inspected the print with a magnifying glass and cannot detect any sign of pixels even at this enlargement (about 4x). On the focus finder all I can see is grain. This is a good result for the digital negative.
I then made two more, one with soft filter 16 seconds and hard filter at 16 seconds and the other with soft filter at 8 seconds and hard filter at 22 seconds. These last two were slightly darker and with more contrast. The higher contrast looks good, but the sunlit patch was left with a shade of gray and so lacks some of the brightness the scene demands. It could be possible to bleach the print down though this is not something I am particularly good at.
 |
| Scan008_stitch f22 #00 16 sec # 16 sec |
 |
| Scan012_stitch f22 #0 8sec #5 22 sec |
My next step was to make a small test strip or patch of the bright sunlight with the soft (#00) filter. The objective is to find an exposure where there is no tone though just barely. This I achieved by running the test strip in 2 second intervals. Through this I determine the minimum exposure with no gray is 4 seconds.
 |
| Sky Test Strip in Two Second Intervals |
I then run my next print as 4 seconds on the soft filter and 16 seconds on the hard filter at f22. This was improved but I still detected a little gray in the sky highlights and further inspection of the test strip indicated it wasn't quite white at 4 seconds. It is also true that the hard filter may be contributing.
 |
| Scan017_stitch f22 #00 4 sec #5 16 sec |
At the same time as the above print, I also tried another print at 4 seconds soft filter and 1/4 stop more of hard filter at 19 seconds. I also dodged the light areas above the dark foreground mountains to bring that area up in brightness. I dodged the hard filter for 8 seconds out of 19 seconds. The extra hard filter helped improve the contrast by darkening mid-tones and shadows. However, the dodging was too much and the extra light in that area was competing with the sunlight in the sky and looked unnatural.
 |
| Scan021_stitch f22 #00 4 sec #5 19 sec dodge sunlit hills |
The next step was to remove the soft filter altogether. Then up the hard filter and dodge the sunlit areas and the sunny sky section to make sure the contrast was enhanced for these areas.
 |
| Scan025_stitch f32 #00 0 sec #5 46 sec dodge sky and hill highlights |
Comments