Printing North Wales Photos
Authors note: This post was started right at the beginning of April but only being completed now at the middle of June. Much happened with my plans and motivation photography-wise shortly after this and this resulted in a long hiatus.
Introduction
What strange times. Here in the UK the government has finally implemented the lockdown and ordered people to stay in their homes. It kind of figures now that the weather has suddenly turned fantastic. The days are much longer and the challenge of getting up early enough (or staying up late enough) for the better light is upon us. The sky is bright by 5:30am now and not long until that moves to 4:30am. |
| Photo for 'Front Page' |
In any case I have a lot to catch up on photography-wise so the lock down should be a good excuse. The whole situation is unnerving however and motivation has been hard to find. I have yet to complete my masking project and finish some masks and print from them. I have a long blog post in the works documenting my exploration of mask making. Lots of mis-steps and nothing especially satisfying yet. I have a couple of more ideas to try however so work to be done. Not sure if such a wandering post will see the light of day. It is even more arcane and mundane than usual.
I do have these photos from North Wales I recently took that I want to print. One print will be a gift for the people we stayed with. Since I took these with my Fuji GSW690iii 6x9 camera I am back upstairs on ‘The Beast’ as it handles negatives over 6x6 for me. I am using my pin registered modified negative carrier (without using the registration pins). I am also using the laser cut masks for this film and I happy it all seems to work well.
'The Beast' is located in a part of the house with a big skylight and no partitions. This has limited its use to night time which is fine but now as the days stretch longer the working hours are unreasonable. Consequently I finished my temporary partition with some cheap Visqueen plastic sheeting. Ugly but effective and temporary.
Metering in the Darkroom
I am also borrowing on some ideas I had developed while working on my mask making. I used my Sekonic handheld light meter to give me some objective measures on the impact of my masks on dodging shadow areas of a print.The Sekonic 308 has been a great little meter for me. My wife bought it for me as a gift after I left my previous Gossen meter in a rental car. The Sekonic only lacks a swivel head on the light sensor. It is more rugged however and is great as a compact versatile meter.
For these experiments I use the Ev (Exposure Value) function. This expresses the exposure in a single number rather than a shutter speed and aperture combination. If I keep it set to the same ISO/ASA (100 in my case) then I have a consistent measure of the light falling on the meter. For this purpose I move the diffusion globe off the sensor (as in the photo above) and use the reflected light mode so the light falls directly on the sensor.
What I did is use the meter on my enlarger baseboard to measure highlights (very darkest places on negative) and shadows (very lightest places on the negative). I do this by laying the meter flat on the baseboard and putting the meter lens under the areas I want to measure. The lens and sensor are quite large so it is limited to larger patches of shadow and highlights. Purpose-built sensors lie closer to the baseboard and have a smaller sensor area. What can I say? I have the meter so this is a cheap solution so long as I understand the limitations. (I am tempted to make a small aperture cover for the sensor but his will exclude light and make it less sensitive.)
During my mask making experiments I made some test prints and took some Ev measurements. One print that was pretty good I got the following measurements. (Remember this is a negative so highlights have smaller numbers and shadows bigger.)
Highlights 0.1 Ev ASA 100
Shadow 3.1 Ev ASA 100
The best print was made with this Ev at 48 seconds exposure. My thoughts are this could be a shortcut compared to making a test strip.
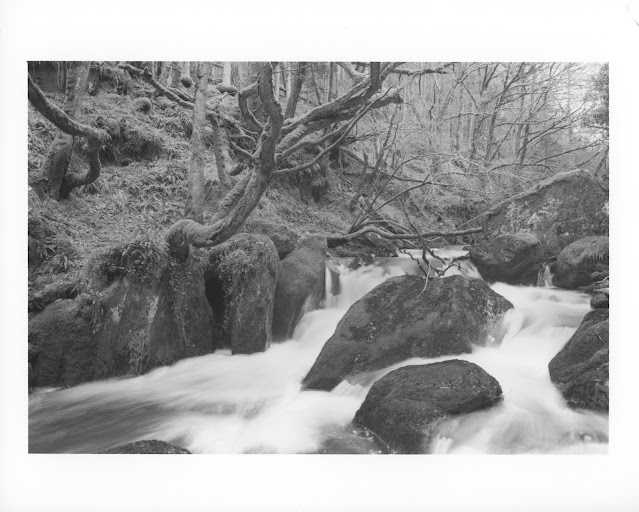
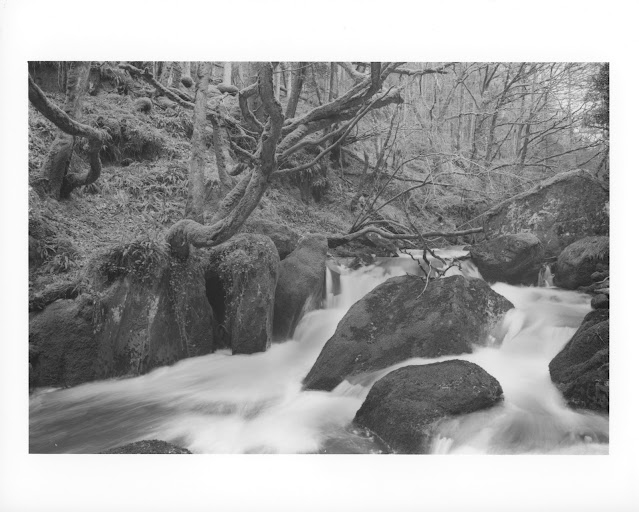
So I set up my waterfall image in my enlarger to print 6" x 9" on an 8x10 sheet of Kentmere VC Select satin paper (The same paper used in the reference print above). I used the #00 filter. I took some Ev measurements of the water for a highlight and a cleft in the rock for a deep shadow. I adjusted the aperture until I got the same highlight reading or Ev 0.1 this was f22. This corresponded to a shadow Ev of 4.1. (This was not the right way to do this it turns out as I should have keyed off the shadow.) I then made the exposure at 48 seconds as this was what I did for my reference print. In any case I made this first print which was too dark.
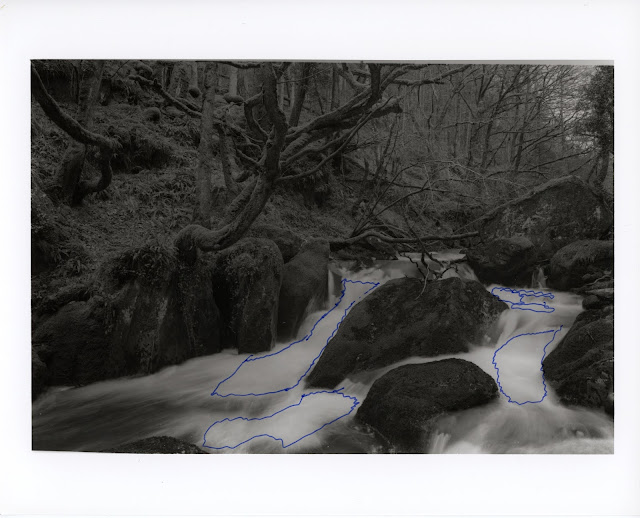 |
First print shadow Ev 4.1. (Ignore blue lines these are my burn plan for subsequent prints.) I needed to key off the shadow so I readjusted the aperture by one stop to f32 and confirmed the Ev measurement at 3.1. The highlight was now too dim for the meter to read. (I could solve this problem by opening the aperture up one or more stops and then subtracting 1 Ev for each stop. For instance in the case here where I stopped down one stop and could not get the highlight reading I know the Ev should be 0.1 - 1.0 = -0.9) I then made another 48 second exposure. (Because of the interchangeability of stops I could have kept the aperture the same and reduced the exposure to 24 seconds.)
This next print was much better as a result. The water is properly white and the rocks and forest less foreboding. There are some cropping problems with the easel I need to fix and I note that there are some horizontal branches at the top of the frame that distract with the edge. I slightly boosted the enlargement to crop those out and to help fix the other edge problems.
My more difficult challenge is that the whitewater sections may now have lost detail. It means I lose the sense of the water falling in those brightest sections. I want to do some careful burning to bring back this detail. The areas are small and many as indicated in the first photo where I have outlined the areas in blue to guide my burning. I am also conscious of the fact that a full stop of burn will make the water gray again which will kill the realism.
I fashioned a special burn tool with a punch hole in the center of some white paper. This means I can carefully control the burn in tight areas. The white paper allows me to see the image and know where the burn is happening as the base board image will be almost completely obscured by the burn tool.
I am faced with a couple choices as well. First should I persist in burning with soft filter where the chances of gray water are more likely? I could go for a higher contrast filter (#3-#5?) in hopes it emphasizes the detail and retains the white better. Second, the burn time could be quite long. Adding a stop of burn would take 48 seconds and since I am applying it only through a small hole building up all the areas could take several minutes. My inclination is to open the aperture 2 stops for the burning part of the exposure. This is always fraught with forgetting to reset the aperture for the base exposure on the next print.
I am also contemplating that I have no overall high contrast filtration in this first print. It looks fine but maybe I need to go lighter on the #00 filter and use some #5 to bring back the shadows. This would give me a better feel for the overall printing choices. This seems like a better next step. Reprint 1 stop lighter. Then test strip with the #5 filter which is my normal flow. Then re-examine to see what approach looks more promising then worry about burning the water in.
Two prints now. First is one stop lighter at f45 #00 48 seconds.
This confirms a very light print but possibly a good background for some high contrast filtration. So the following is a #5 filter test print. The base is #00 at f45 48 seconds as above then 8-64 seconds #5 filter stepped from right to left in 1/2 stop intervals. The demarcations are difficult to see. I spaced them closely to see the effect on the water and then end about halfway across the print at 64 seconds.
In retrospect this is the wrong test strip. Given a good #00 filter exposure is 48 seconds or more and that the #5 filter is a step darker I should have opened up the aperture by 1 stop at least. Comparing with the straight #00 print the 64 second of #5 filter is too much and from my eye 32 or 45 may be closer to the mark. The light #00 print will likely require some more burn with #00 on the upper right corner. This naturally leads me to think maybe another stop lighter on #00 with more #5 filter and a lot more burn could give me a better looking print.
So going back to my original aperture of f22 (2 stops) I could take the 48 second #00 exposure down to 12 to get here so 6 seconds to get another stop lighter. Perhaps then 45 seconds #5 then breaks down to 11 seconds at f22. This then gets my burn times down without shifting the aperture back and forth.
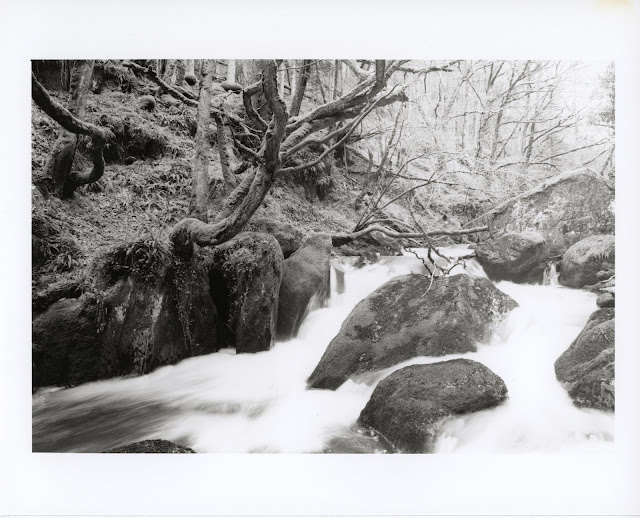
The next results follow. First is the f22 version at 12 seconds #00 which is equivalent the f45 at 48 seconds; I then overlaid #5 filter at 11 seconds which is f45 at 45 seconds.
I can probably make this work. The sky facing surfaces above the rocks and in the upper right would need some burning in with a #00 filter. The water of course needs work as well.
I also made the f22 at 6 seconds #00 print with a #5 test run on top with intervals of 0, 4, 8, 12, and 16 seconds.
The far right strip tells me I have 'gone too far' in the words of David Kachels so I fulfilled this mandate! The region towards the left is very similar to the exposure above though with more contrast.
So I am left with a dilemma. The straight f32 #00 48 second print retains lots of appeal. The higher contrast image has some appeal with the enhanced contrast but I feel it may lose a lot if I have to burn with #00 filter. So I think I will focus on the #00 print and get the water burn right. To keep burn times down I am thinking f22 at 24 seconds or f16 at 12 seconds. The add #5 burn on the water or perhaps #3. I think I want a higher contrast burn on the water to retain the white while bringing out what detail I can. the original print shows the muddled gray of too much burn with the #00 filter.
This next print was much better as a result. The water is properly white and the rocks and forest less foreboding. There are some cropping problems with the easel I need to fix and I note that there are some horizontal branches at the top of the frame that distract with the edge. I slightly boosted the enlargement to crop those out and to help fix the other edge problems.
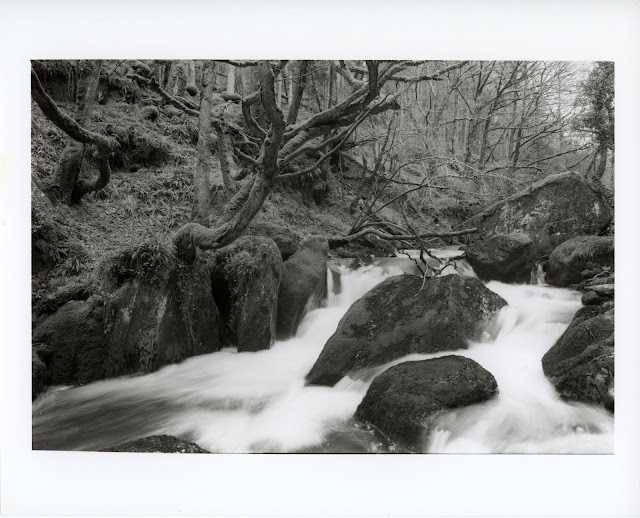 |
| Second print shadow at Ev 3.1. Highlights are slightly blown however. |
My more difficult challenge is that the whitewater sections may now have lost detail. It means I lose the sense of the water falling in those brightest sections. I want to do some careful burning to bring back this detail. The areas are small and many as indicated in the first photo where I have outlined the areas in blue to guide my burning. I am also conscious of the fact that a full stop of burn will make the water gray again which will kill the realism.
I fashioned a special burn tool with a punch hole in the center of some white paper. This means I can carefully control the burn in tight areas. The white paper allows me to see the image and know where the burn is happening as the base board image will be almost completely obscured by the burn tool.
I am faced with a couple choices as well. First should I persist in burning with soft filter where the chances of gray water are more likely? I could go for a higher contrast filter (#3-#5?) in hopes it emphasizes the detail and retains the white better. Second, the burn time could be quite long. Adding a stop of burn would take 48 seconds and since I am applying it only through a small hole building up all the areas could take several minutes. My inclination is to open the aperture 2 stops for the burning part of the exposure. This is always fraught with forgetting to reset the aperture for the base exposure on the next print.
I am also contemplating that I have no overall high contrast filtration in this first print. It looks fine but maybe I need to go lighter on the #00 filter and use some #5 to bring back the shadows. This would give me a better feel for the overall printing choices. This seems like a better next step. Reprint 1 stop lighter. Then test strip with the #5 filter which is my normal flow. Then re-examine to see what approach looks more promising then worry about burning the water in.
Two prints now. First is one stop lighter at f45 #00 48 seconds.
This confirms a very light print but possibly a good background for some high contrast filtration. So the following is a #5 filter test print. The base is #00 at f45 48 seconds as above then 8-64 seconds #5 filter stepped from right to left in 1/2 stop intervals. The demarcations are difficult to see. I spaced them closely to see the effect on the water and then end about halfway across the print at 64 seconds.
In retrospect this is the wrong test strip. Given a good #00 filter exposure is 48 seconds or more and that the #5 filter is a step darker I should have opened up the aperture by 1 stop at least. Comparing with the straight #00 print the 64 second of #5 filter is too much and from my eye 32 or 45 may be closer to the mark. The light #00 print will likely require some more burn with #00 on the upper right corner. This naturally leads me to think maybe another stop lighter on #00 with more #5 filter and a lot more burn could give me a better looking print.
So going back to my original aperture of f22 (2 stops) I could take the 48 second #00 exposure down to 12 to get here so 6 seconds to get another stop lighter. Perhaps then 45 seconds #5 then breaks down to 11 seconds at f22. This then gets my burn times down without shifting the aperture back and forth.
The next results follow. First is the f22 version at 12 seconds #00 which is equivalent the f45 at 48 seconds; I then overlaid #5 filter at 11 seconds which is f45 at 45 seconds.
I can probably make this work. The sky facing surfaces above the rocks and in the upper right would need some burning in with a #00 filter. The water of course needs work as well.
I also made the f22 at 6 seconds #00 print with a #5 test run on top with intervals of 0, 4, 8, 12, and 16 seconds.
The far right strip tells me I have 'gone too far' in the words of David Kachels so I fulfilled this mandate! The region towards the left is very similar to the exposure above though with more contrast.
So I am left with a dilemma. The straight f32 #00 48 second print retains lots of appeal. The higher contrast image has some appeal with the enhanced contrast but I feel it may lose a lot if I have to burn with #00 filter. So I think I will focus on the #00 print and get the water burn right. To keep burn times down I am thinking f22 at 24 seconds or f16 at 12 seconds. The add #5 burn on the water or perhaps #3. I think I want a higher contrast burn on the water to retain the white while bringing out what detail I can. the original print shows the muddled gray of too much burn with the #00 filter.
So the next batch of test prints set about trying to execute these ideas. It turned out to be painful. You might skip to the end to see what I concluded (and learned).
This first test print was done at f16 with a #00 filter at 12 seconds and a #5 test strip at 8, 16, 24, and 32 seconds. Here it should have become obvious that there isn't that much detail available in the white water areas. Mostly they just got gray.
I then tried #00 at 12 seconds and then #5 burn of water areas for about 16 seconds. Only very careful inspection reveals some areas with more contrast where there is already detail present. I chose 16 seconds of #5 from the previous test print as showing the first level of toning on the water. My burn device was a hole punched in opaque paper which I moved around the white water areas. It was a small burn area and difficult to keep on target and get a full 16 seconds of burn. The movement of the burn tool is probably why the water still looks quite white as it probably did not get the full 16 second sin most places.
I next tried an medium contrast filter. Strictly speaking split contrast filtering is the use of the highest and lowest contrast filters. Modulating contrast through exposure differences between these filters in theory results in all contrast ranges in between. I have however used intermediate filters in the mix to good effect. (My 'discovery' of this is in this post.) I used a #3.5 filter which in addition to having less contrast is about one stop stronger in terms of exposure. A little more exposure is apparent in some areas here but I thought I could get more out of it.
By now I was getting impatient and so set the aperture to f11 for the #3.5 filter. The areas f burn are now obvious but I am pretty sure I am not reveling image detail just adding tone to the white areas.
Conclusion
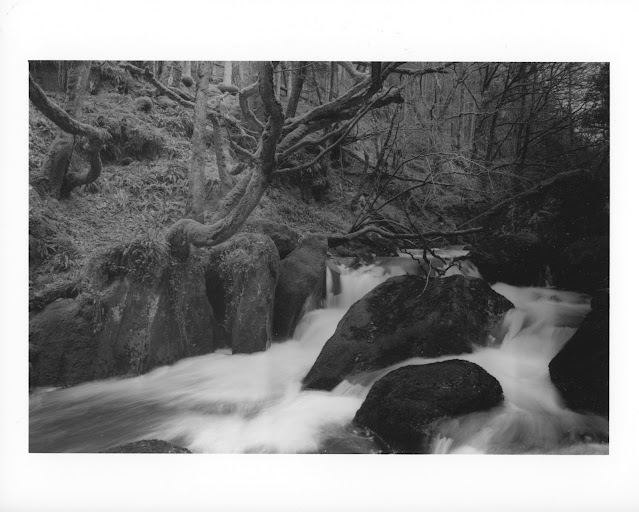
I spent a lot of time getting to this point and it was one mostly of disappointment. The second to last image is probably the best of the burns I tried. I concluded however I was really adding tone and not detail for the most part. This left the water gray which I had intentionally over-exposed (See write-up here.) to be white. In the end I think some of my original simpler prints are best. To make a better print I will need a better negative and that would require a faster shutter speed. The long 1 second exposure for this scene means in very active areas the detail is lost. With all the random activity any detail gets averaged out.






Comments