There is a lot for me to unpack in this title believe it or not. I have been shooting 6x17 (with a Fuji G617) for just over a year and loving it. During this time I discovered other wide format photographers and in particular to this post,
Carwyn Davies who contact prints 4x10 on Lodima. They look very nice. Below is one nice example.
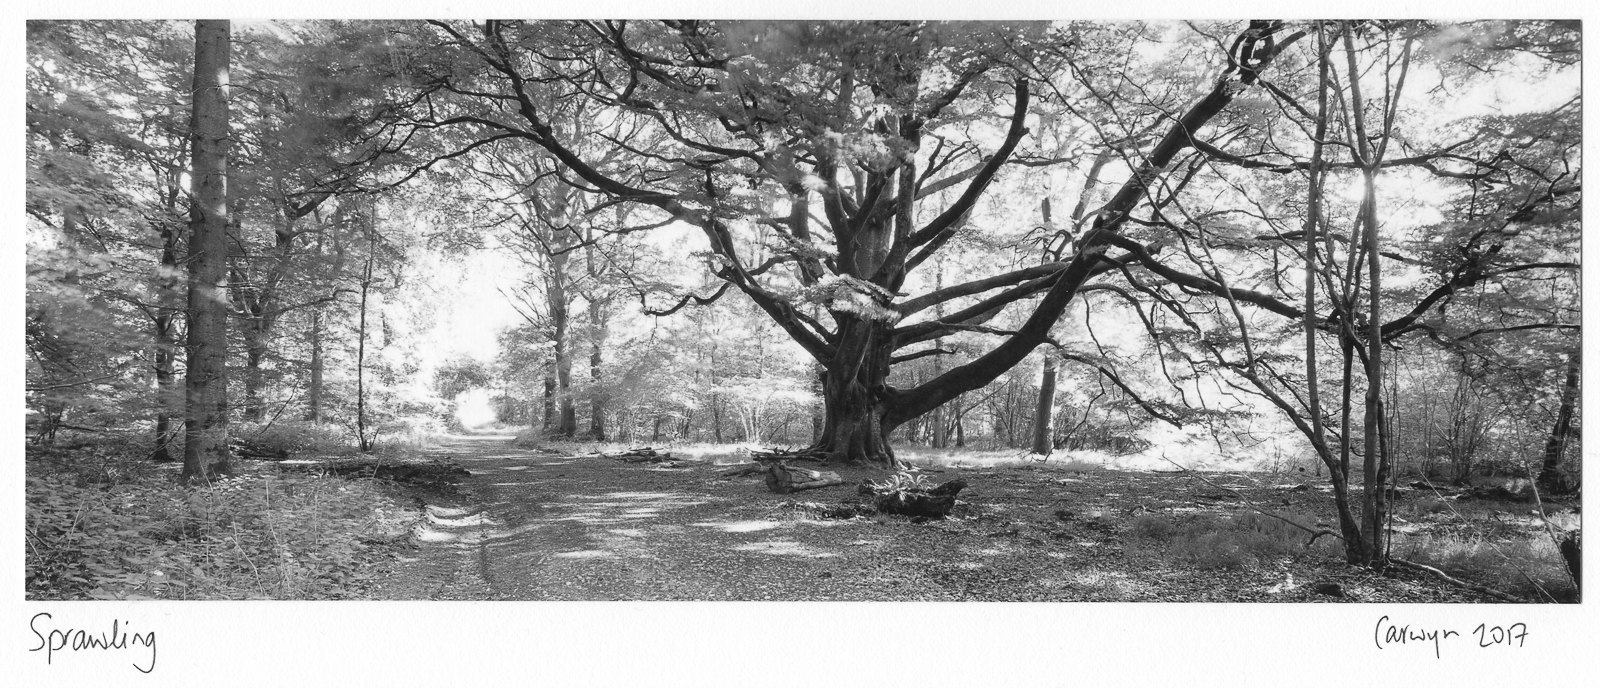 |
| Sprawling 4x 10 Contact Print on Lodima Paper by Carwyn Davies |
He creates a nice white border with some room on the bottom for the title and a signature. I like what he has done here though I am not sure if I would mar my work with the scrawl that passes for my handwriting.
Another gentleman
Alexey Belov contact prints 6x17 as a palladium print. These too look intriguing. One example below.
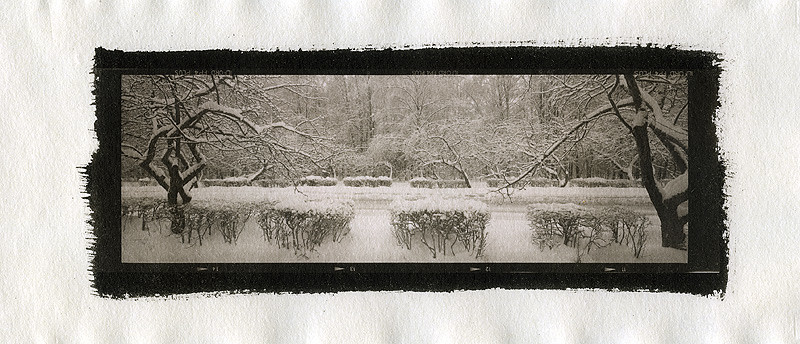 |
| Silence Of The Snow. Palladium print on Kozo paper by Alexey Belov |
These are of course small prints but I am sometimes afraid that printing big takes one away from a whole other avenue of expression.
Further unpacking...!
Several years ago as I was exploring different photographic papers I ran across Lodima paper as a resurrected version of old Kodak Azo contact printing paper. I even bought the ingredients to the recommended Amidol developer made famous by Edward Weston. There is an interesting story behind the artists
Michael A. Smith and Paula Chamlee who resurrected this paper if you don't know it.
In any case the materials have sat unused in my darkroom until last night. My recent spate of activity in the darkroom had me sorting through my paper stock recently worried that one batch of fogged Foma paper meant my other neglected papers were similarly afflicted and I ran across the Lodima paper during this process. I resolved to see if the paper was still OK. Likely this will morph into a real project now that it is engaged. (I still have a stack of Oriental Seagull to look at as well. See what I eventually did with it
here...)
Lodima is a silver chloride paper from an era when contact printing was king and enlargers were few or non-existent (Azo started out over 100 years ago!). Typically you would work with a large format negative 4x5/5x7/8x10/16x20 up to 20x24 inches! The negative is placed directly onto the paper and then exposed to light; often a bare bulb suspended directly above the paper for a period of time.
Because the light source was bright the existing silver chloride paper worked fine. It is very slow (perhaps 20x slower than modern papers) but this is not a problem given the light source. As photography moved to enlargers and smaller negatives the speed of silver chloride paper became a liability and new formulations that mixed in silver bromide increased the speed. Many argue something was lost in terms of the deeper blacks available with silver chloride paper. There is also general agreement that highlights can retain more detail when this paper is developed with Amidol. It should also be pointed out that some of the popular attributes of different papers may have in fact been a fashion.
When Ansel Adams and the f/64 group started up they established themselves as against the silver chloride papers and for the cheap bromide-only papers as aesthetically superior. This may have have helped with the demise of silver chloride paper. A good article on this history is
here.
Day 1 Work
Last night I looked up my only black and white 6x17 negative set (4!) and found an appropriate image. This was a roll I shot right after I got the camera. I shot it on Ilford Pan F+ (ASA 50) a film I rarely shoot but have a few rolls in the freezer. It was overdeveloped (only the second time I have developed this film.) the result of which is the sky shows very dense and hence white in a print. The scanned negative is below. It was a bleak overcast early spring day
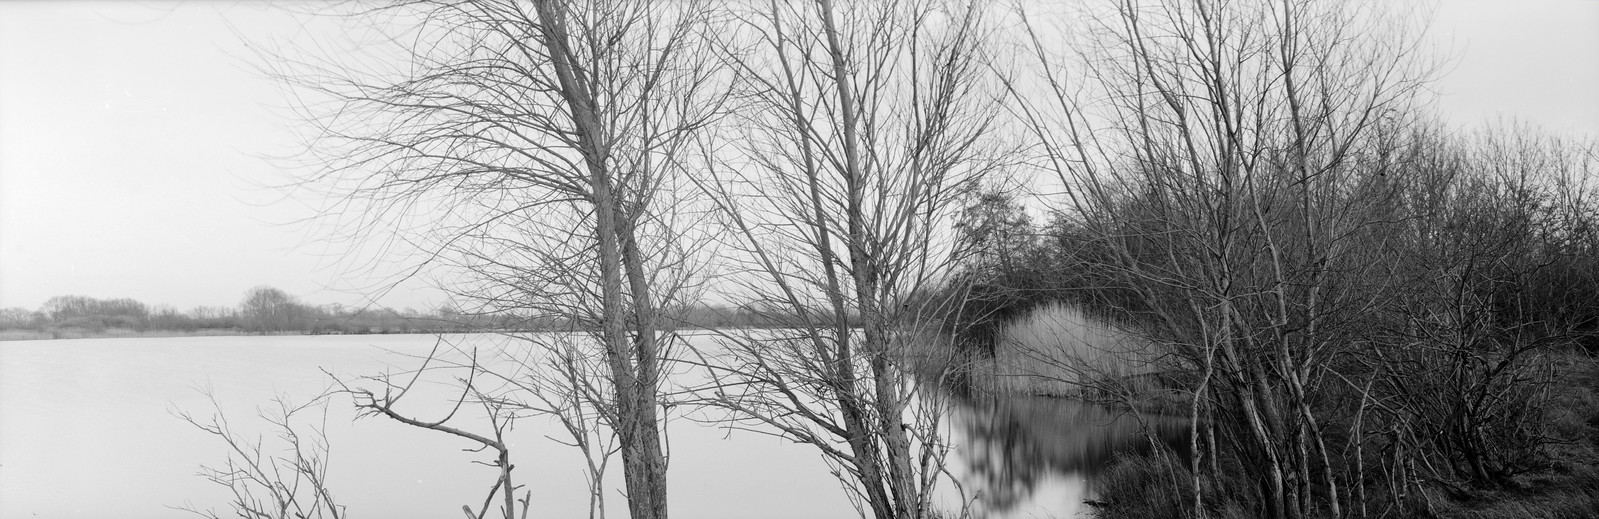 |
| 6x17 Negative Scan |
I then cut up under my safe light a sheet of 8x10 Lodima grade 3 paper into four 2 1/2" strips which can just contain the 6x17cm image. In this sense the project is very economical. (This paper is very expensive at about $70 for 25 sheets.)
I then assembled a makeshift printing frame from an 8x10 easel and a sheet of single pane glass. I made a first test strip starting under the room lights at 20 second intervals.
Before I went to the trouble of mixing up Amidol I decided to develop these in my regular developer Moersch Eco 4812. Amidol would come later after I figured out the exposure. I can say that even in regular developer the image comes up in a few seconds on this paper.
 |
| Test strip in 20 second intervals |
This revealed an image faintly at the far end of the strip at around 120 seconds. Next I started a new strip at 3 minutes with 1 minute further intervals. Now a better image shows, again at the right, at 5 minutes exposure. Better but somewhat washed out I thought.
 |
| Test strip starting at 3 minutes ending in 5 minutes |
I then ran a final full print at 7 minutes but it is hard discern from the 5 minute exposure.
 |
| Print at 7 minutes |
That was it for the evening. I concluded a couple of things. 1) I need a better (brighter) light source than room lights to get the exposure time down under a minute. 2) I would like a better printing frame to mask the area outside the image to give a white border. The frame and paper I would make to resemble the lovely layout Corwyn Davies has. I have some Rubylith I may use for this as it is think and flat and transparent red that blocks the light to the paper. Finally I would mix up some Amidol and see what happens.
Day 2 Work
Tonight I scrounged in the garage and found a lamp with a cord. It had a compact florescent bulb rated at 75w. I hung the lamp from my enlarger. I also decided I should do a little more than guess work to try and get the brightness such that I could print at under a minute.
Towards this end I got out my light meter and metered the place where I had exposed the prints the previous night in the room lights. It read an Ev of 3.8. The new lamp at the height I had it at read Ev 9.3 so 5.5 stops different. I knew from the previous days work I needed to be north of 7 minutes. Five stops is 32 times as bright so 8 minutes would put me in the range of 15 seconds. I thought I would try this. Probably optimistically. The test print at 10 second intervals went very dark after 20 seconds.
 |
| First Test strip with light at Ev 9.3 10 second intervals |
I realized my bulb was too bright. I found an old compact florescent rated to replace a 60 watt bulb, this was the dimmest I had to fit the lamp. I then reasoned I wanted the exposure to be about 4x (2 stops) longer than the previous test print. So Ev 9.3 should be Ev 7.3. The bulb was brighter than that but I could raise the enlarger and with the lamp hanging from it get it further from the easel until the meter read Ev 7.3. I then ran a new test strip, again at 10 second intervals.
 |
| Second Test strip with light at Ev 7.3 10 second intervals |
This showed I needed to be between 30 and maybe 50 seconds. I opted for a print at 35 seconds.
 |
| Print at 35 seconds with 2 minute development |
This was pretty good though I decided to make a second print at 50 seconds to increase the contrast I would try to snatch the print while watching under the safelight before it developed fully. This result is below. I snatched it at 1 minute rather than let it run to a normal 2 minutes development time.
 |
| Print at 50 seconds with 1 minute development |
These last two results look good. Now I have the exposure times dialed in I can move onto other steps. The useful thing is to now I need to have alight source at about Ev 7.3 at least for this negative but should put me in the ballpark. After I have put away my setup I can quickly get to the right light level.
Day 3 Amidol
Today I focused on get the masking right and using Amidol for the first time. The masking was frustratingly difficult as I couldn't make my more elegant ideas work. I tried lith film and making the mask negatives on my inkjet printer. The printer however was acting up. I did get a laser printed copy but the contrast was not sufficient to make a high contrast mask and the toner and paper density variation ended up printing through to the lith film. I have used this in the past with great success but on my inkjet printer.
I ended up using my easel and some black card to mask the right and bottom portions. I cut 8.4cm x 8" strips from the 8x10 paper to get exactly 3 strips to print on. I aimed for about 12mm borders except the bottom which his about twice that.
Next I mixed up a batch of Amidol developer. There are lots of
formulae on Unblinkingeye and I ended up using Michael Smith's formula. There are lots of formulas and lots of different results and opinions. I invite you to read around. Differing objectives such as image tone, developer life, contrast etc are all in the balance. In general Amidol has a poor shelf life and as such is a single-use developer. The one I chose does last about a day. It had plenty of potency 24 hours after mixed. I mixed 500mL for my small prints in an 8x10 tray. I wanted to preserve my chemicals.
Michael A. Smith’s Amidol
|
Water, 70º F
|
750 ml
|
Sodium sulfite, desiccated
|
30 g
|
Citric acid
|
3 g
|
Potassium bromide, 10% sol.
|
2 ml
|
Amidol
|
8 g
|
Water to make
|
1 liter
|
| For use with Azo contact paper. |
|
All of the material cautions one on how irritating the dust is. I thought I was careful about making an breathing the dust but I was not careful enough. I will wear a face mask next time. The irritation continued throughout the evening and I would not want to repeat it. Amidol can also blacken your skin so I wore gloves to work the solution and the prints.
I reset my lamp up for contact printing and adjusted the height using my lightmeter to get an Ev of 7.3 again in the exposure area. I decided as a departure point to use the exposures I tried before starting at 30 seconds. Once placed in developer the image comes up quickly and I stuck with Michael Smith's 30 second recommendation. Longer development did not add much to the image but there are complaints about the tone turning more green. Indeed this is one characteristic of Amidol on Lodima, a tendency to a greenish cast, this puts off many people. The first print was too dark.
 |
| 30 Seconds Amidol on Lodima |
Next I went to additional prints at 20, 15, 11, 8 before settling on 13 seconds. The scans are below. Objectively the scans show a pinkish cast which Amidol is known for though it is less pronounced looking at them directly. My wife did comment she saw a pink tinge. There is an ever so slight greenish cast but not overtly or unpleasant. Selenium toning in very dilute 1:127 solution for 30 seconds is supposed to make the tone more neutral. Some (though not all) prints show significant fogging on the borders. I am not sure what causes this. In my recipe I doubled the amount of KBr accidently but my understanding is KBr as a restrainer should reduce fogging.
 |
| 20 Seconds Amidol on Lodima |
 |
| 15 Seconds Amidol on Lodima |
 |
| 11 Seconds Amidol on Lodima |
 |
| 8 Seconds Amidol on Lodima |
 |
| 13 Seconds Amidol on Lodima |
 |
| Best ECO 4812 developed print |
I have included the best result I go from the 'normal' Eco 4812 developed image for comparison
I am beginning to understand what the interest is in this combination. The image is lower contrast than I prefer however I am impressed by the range of tones the paper brings out. In the right side of the print there is more detail and tonal separation.
Conclusions
I can see the benefit of the Amidol/Lodima combination. However my large format work is primarily 4x5 and I think I could never be satisfied with only contact prints. The paper is too slow for the enlarger. I think this is what will keep me from pursuing this paper much further at this time.
I made a couple more prints from a 4x5 negative. These are as follows.
 |
| 4x5 Tree 15 sec |
 |
| 4x5 Tree 12 sec |
 |
| 4x5 Tree 8 sec |


Comments