Mounting Panoramas (on the cheap)
 |
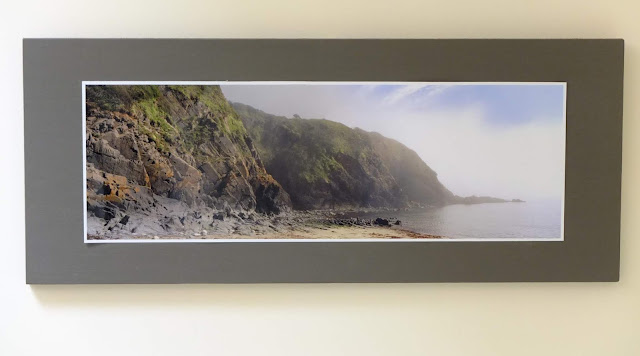
| A finished Mounted Panorama |
Some time back my wife and I made up some plasterboard (Sheetrock) swatches of color to try on our hall. Later looking at them in the garage I tried to imagine a photograph mounted in the center of such a colored board.
With my purchase of the Fuji G617 I have printed a few of the better panoramas on Fuji photographic paper. I use the good folk at Peak Imaging who have always treated my film well. I chose to print 3 images at a time one 20" wide paper. This allowed me to fit three vertically on a 20x20 sheet of paper and this is more economical compared to three 8x20 prints. I then only have the trouble of cutting them apart and making all the margins match. It looks like this...
 |
| A 20x20 Triptych |
These photos are all taken with Kodak Portra 800 film. I don't know why I had this film in my freezer but it seemed to be waiting for the Fuji G617. Perfect for handheld work it prints easily to 20 inches with no sign of grain.
I thought these would be good to try my plasterboard mount idea. It is very simple. Cut a piece of 12.5mm thick plaster board to panoramic dimensions, paint the edges, then glue the photo to the front. I would have used thinner plasterboard but I could find any on the day I went shopping.
This is very economical as for a few pounds I can get a small 600x1200mm sheet and get maybe 4 boards to mount to. I chose to use the native width of 60cm (24") as this makes a pleasing border on the 150cm (19.5") photo. I chose a height of 25cm (10") for the 15cm (6") height of the print.
For paint I used interior latex and to keep from having lots left over I used color tester pots. This limits the range of color but also keeps the expense down. My wife suggested a brown for the middle photo and the closest I came to was 'Chocolate Torte' which has a bit of green in it it turns out.
I marked out the center of the board where the photo will go. No sense painting that area. Paint the edges of the board first then the border for the photo. I wanted to emphasize the horizontal so I made all the brush strokes the long dimension of the board. I didn't bother to use primer but one might want to as the plasterboard can soak up the paint. I kept brushing as the paint dried as I wanted the brush strokes to be visible. The matte finish and brushstrokes contrast nicely with the high gloss of the print.
Finally mount the print with your favorite method. (I found that 3M PMA Positionable Mountable Adhesive works great. If you haven't used this before it has most of the benefits of dry mounting without the need for a press.)
My first attempt looks like this hanging on the wall...
It looks much better than I had imagined. It is clean and modern, the dark edges gives the photo a 3-D effect looking into the forest. I was very pleased. To mount it on a picture hook I cemented the two ends of some cord between blocks of thin card and the plasterboard. Once fully dried it seems to do the trick. It is difficult to use screws or other fasteners in plasterboard.
 |
| Hand-made Hanger Cord |
I realized while doing this that plasterboard is heavy and delicate. It must be handled carefully so that it does not dent or scratch. It dawned on me that Masonite is a better answer. It has a smooth paintable surface, is cheap, and is more rugged. For Masonite I could also use normal picture hanging hardware though I did have to cut down the screws so they didn't protrude through the front of the photo.
From here on I made additional units from Masonite.
 |
| Whistling Sands Beach |
 |
| Walsingham Abbey Grounds |

Comments