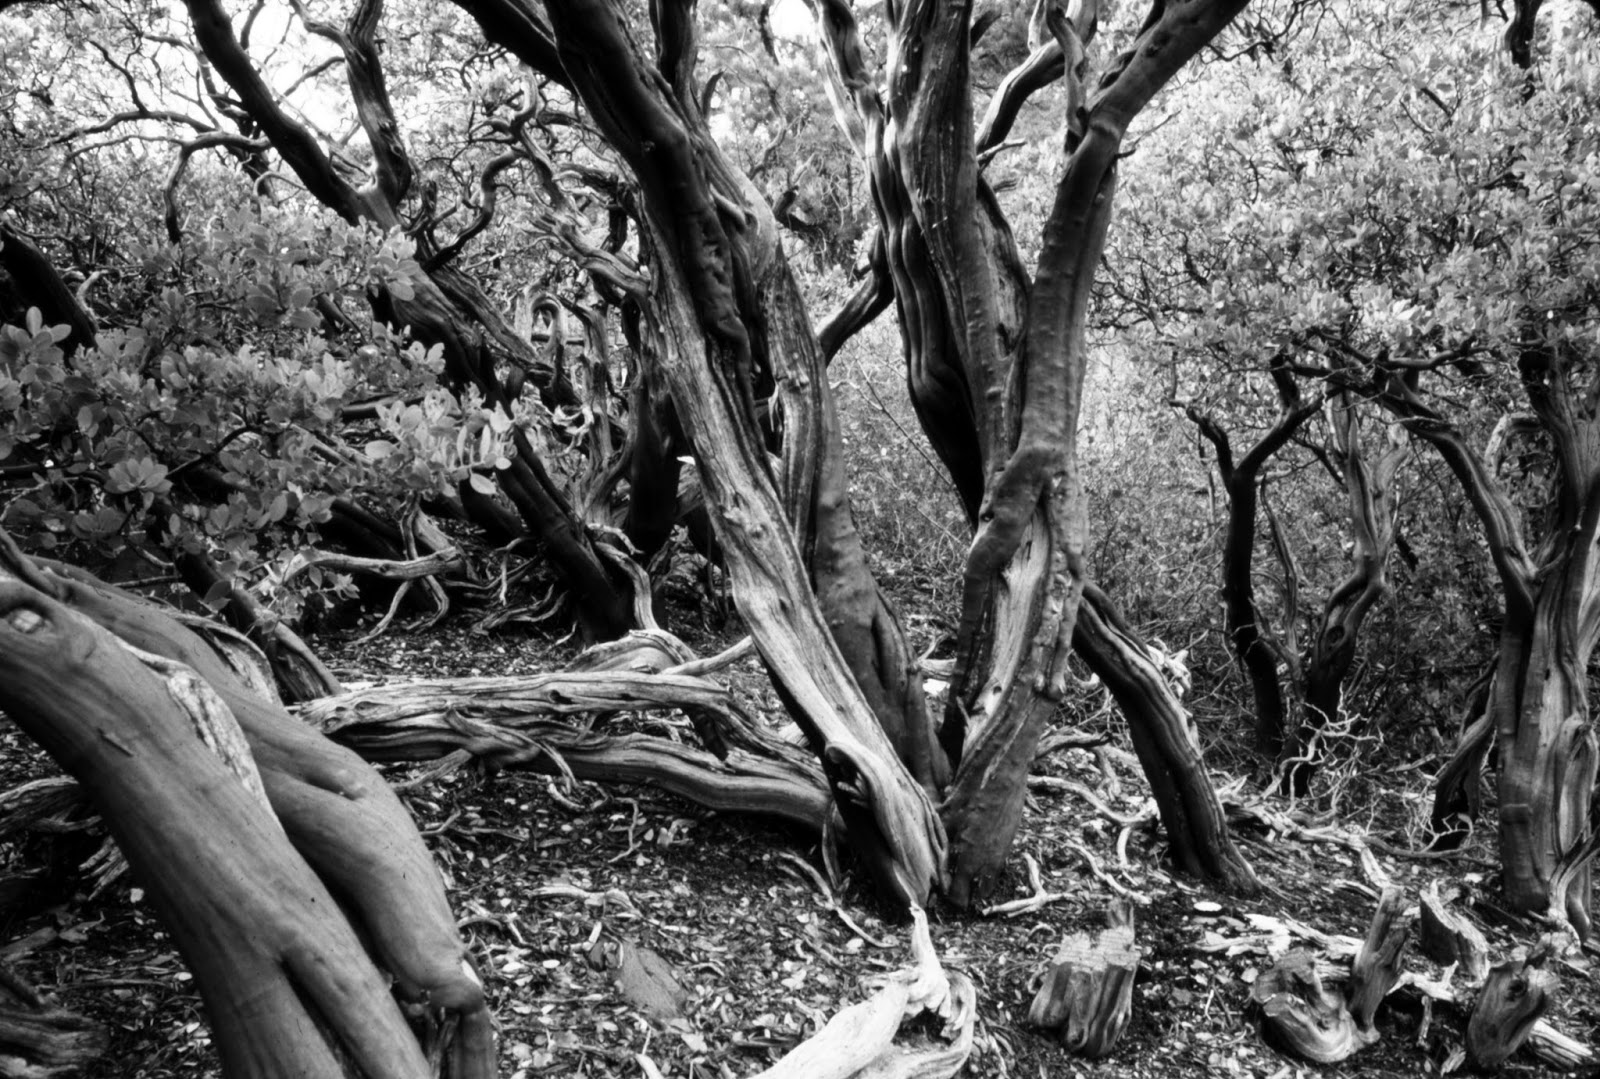
I was scanning some of my brother's 35mm Kodachrome slides from a backpacking trip he did many years ago in the Mazatzals in central Arizona. I was struck by one photo of some Manzanita bushes and thought that would be good to print in Black and White. The slide is below.
I would need to transform it from a color positive to a black and white negative. I have done this before with a
paper inter-negative but settled on a film inter-negative which I have
done before as well. This time however I decided to try a different method of creating an inter-negative.
The slide is 35 mm so I figured 6 x 4.5 cm would be a close enough fit for aspect ratio. I didn't want to deal with roll film as I would get committed to an entire roll of film. I can also get four of this size negative from a sheet of 4x5 film. So I started with some Fomapan 100 film which I cut to the 5x4.5 cm size pieces.
I mounted the slide in the enlarger and adjusted it to focus as a 6 x 4.5 sized image. This required me to stack some text books up under my easel. I used a small easel as the projection surface and taped down a small corner of thick black paper so that I could align the film in the dark. (No red safe light for this as I am using panchromatic film.)
 |
| 8x10 easel with black paper corner on stack of text books. |
 |
| The projected slide aligned with the black paper corner |
With this now focused and aligned I needed to determine the exposure. I metered at ASA 80 and read 4 seconds at f22 with the enlarger set to f4. I am unsure of my references so I used a range from f11 at 4" to f22 at 1". The results at the slower end of the range were superior. My first batch at the faster end of the range were dark (overexposed) and contrasty. The second batch at the slower end I attempted to reduce contrast by developing at 4:30 minutes vs 5:00 minutes in the case of the first batch.
With the high contrast I also experiment with some expired Ilford HP4 film. The idea is the fogging would restrain the contrast. It did as it turns out reduce the contrast but seems to have compressed the tonal range.
Finally I took the the best examples and printed them. The first is based on a Foma 100 negative. With no high contrast filtration using only the low contrast filter it is apparent the negative is very contrasty. There is a darkened band along the bottom of the print I cannot explain.
 |
| Foma 100 Negative Printed f11 #5 0 sec #00 54 sec |
Finally the negative based on the expired film is printed. It is clearly a more dense negative as it was printed at f4 (versus f11 in the print above). It is also has less contrast as I had to add #5 filtration to bring up the contrast. In any case the tonal range is compressed and this is easiest seen in the leaves in the upper right.
 |
| Old Ilford HP5 Negative Printed f4 #5 10 sec #00 54 sec |
Here is a Photoshop conversion of the scanned color slide to black and white for reference. I think the endeavor was a success.
 |
| Digital conversion from slide |
Retrospective:
The next time I attempt this I am inclined to do things differently. First the cutting of 4x5 film into pieces was fraught with error as it has to be done entirely in the dark. This meant the pieces were rarely cut to the straight dimensions or on square angles. This is despite putting guides in place on my cutter to help in the dark. The film took a lot of handling as well and this meant some damage was inevitable. Especially trying to load the film reel and develop the film.
If I attempt this again I would take a full sheet of film and expose each corner one at a time. Rotating the film for each exposure. I would make a mask for the 6 x 4.5 section that would hinge over the film on a piece of tape and protect the rest of the film sheet from exposure. Then I could develop the entire sheet (much easier) and finally cut the individual images from the sheet for development once dried.
Update:
I had some time this weekend to investigate my retrospective comments I made above. I made the hinged mask from black paper. Below you can see the new film mask in open and closed position. The 4x5 film sheet is 10 cm on its shortest edge. The rotation of the film is such that a short side of the image is next to a long side of the next image. This restricts my original idea of 6x4.5 cm to 5.5x4.5 cm as a 4.5 cm and 5.5 cm edge sums to 10 cm. The long edge of the film represents no problem here. One could decide to mask it square at 5x5cm there are not real magic dimensions here. I just need to fit my enlarger negative holder in this case it is limited to 6x6 cm. Such size or larger would reduce one to only 2 negatives per sheet however. With the long dimension being about 12.5 cm 6x6 cm is the practical limit for multiple negatives on a sheet.
 |
| Film mask in closed position |
 |
| Film mask in open position |
In use the only real problem happened when the film slid under the alignment corner in the upper left hand corner. This happens if one is not very careful aligning the negative which is easy to do in the dark. When this happens the film appears above or to the left of the mask and leaves a small overexposed area from a subsequent exposure. You can see this in the scanned negatives below as small black rectangles in the lower left and lower right images.
 |
4x5 Negative of Live Oak. with 4 bracketed images.
Counterclockwise from upper left (f16 4sec, f22 4 sec, f22 2sec, f22 1 sec) |
 |
| Live Oak Slide Image |
The next one worked better as I didn't make the above mistake.
 |
4x5 Negative of Agave. with 4 bracketed images.
Counterclockwise from upper left (f16 4sec, f22 4 sec, f22 2sec, f22 1 sec)
|
 |
| Agave Slide Original (note I cropped the negatives I made |
Live Oak Print Experience
With the Live Oak negative I pick the best example to print. In this case its was the the f22 2 second exposure that got ruined with the exposed square in it. I cropped around this however. The least exposed while not ruined seemed to have less detail in the highlights and I am more interested in learning how to get the best print.
Printing the scenes in the central Arizona mountains is challenging. The challenge is made worse by the introduction of an inter-negative. A sunny and bright day in Arizona has extreme contrasts and they are exhibited in these prints. Some areas get direct sunshine and others are in shade. Furthermore the inter-negative introduces another increase in contrast at the micro as well as macro contrast level. This is exhibited by the fact that printing is almost entirely done with a #00 filter. It does not help that in my experience Fomapan 100 film is inherently higher contrast.
Below are some test prints I did. The first was from a read of the #00 test strip and did well in the shady portion though the upper left with direct sunshine suffered.
 |
| Kentmere VC Select Print f16 #00 64sec |
The upper left is bright and the print seems to me to lose tonal balance. One can see the challenge my brother faced in getting the original Kodachrome slide exposed properly as well as shooting ASA 64 film and the notorious narrow range of Kodachrome the original slide struggles to capture this range as well. I was also aware my brother was shooting wide open as the depth of field indicates. The boulder in the foreground is out of focus as is the background. I surmise this is the slow film coupled with shooting in the dense shade of the live oak tree.
The next attempt I burned the upper left portion for an additional 30 seconds. This brought the print back into better balance as seen below.
 |
| Kentmere VC Select Print f16 #00 64 sec burn upper left 30 sec |
Next I tried the densest negative (exposed at f16 for 4 seconds) to see if it could mitigate the contrast. On the contrary it was worse as shown by the straight print below.
 |
| Kentmere VC Select Print f8 #00 45 sec |
Agave Print Experience
Next I printed the agave negative. Again I selected the f22 at 2 second exposure of this batch as the best. By now I had abandoned a #5 test strip and stayed with #00. I started out with f16 for the first print as follows and exposed the paper for 64 seconds. Again the left side of the photo suffered from direct sunlight.
 |
| Kentmere VC Select Print f16 #00 64 sec |
The next print I exposed one stop faster at f11 and 32 seconds brought the left side of the print into balance by burning for 15 seconds on the left side. Much more satisfactory.
 |
| Kentmere VC Select Print f11 #00 32 sec burn left side 15 sec |
Revisiting the Manzanita Negative and Print Experience
Given my success with the new masking technique I decided I would be remiss in not using it for the original slide I wanted to print of the Manzanita trees. I also wanted to try some other film. I have some Delta 100 4x5 film which should be superior. So I used the same exposure settings on a sheet of Delta film and got the following.I developed it with 10% less development time and hoped this might reign in any contrast problems at one of the exposures.
 |
Ilford Delta 100
Counterclockwise from upper left (f16 4sec, f22 4 sec, f22 2sec, f22 1 sec) |
Next I printed from the f22 1 sec negative. Again I had pretty high contrast and used almost entirely #00 filter.
 |
| Kentmere VC Select Print f22 #0 45 #5 5 sec |
I next tried the f22 4 second negative to see if it improved in terms of contrast. It seemed to as the print improved with the addition of number 5 filtration. The result is below. I cropped it differently than the other. It was here I noted small white spots in the print. There is nothing physically on the emulsion of the negative so I can only surmise the film had some fine dust on it when it was exposed.
 |
| Kentmere VC Select Print f22 #00 54 sec #5 16 sec |
Conclusion:
For me this worked very well in the end. I think it will remain in my toolbox for finding new material to print. I have a number of my own slides and my brother's that I may I may wish to print.


Comments