I have only been at this game of darkroom work since 2013 and my return to film and photography happened only in 2009. So I suppose I am part of the small army of newer retro photographers who depend on the vast experience of others on their blogs and forums.
I got into the darkroom in a round-a-bout way starting with an idea I had to use than iPad as an enlarger written about
here. This project was a success and done as an intellectual exercise. (I plan on revisiting this project again as I have a lens from a 4x5 camera that should produce an image with less vignetting.) I produced a handful of interesting prints. I tried to minimize the cost so I bought a minimum of chemicals and some grade 2 FB paper by Ilford as the cheapest I could find at the time. However this meant I was much closer to a full darkroom. The iPad as an enlarger was interesting but not quite the same as the real thing and so finding myself on the slippery slope I did what what one does, I slid down.
As I said since 2009 I have been into film. I started with my grandfather's Nikon F and then bought a Mamiya 645 as I wanted to shoot medium format. I did the analog to digital flow and scanned in all of my film. Eventually Flickr came around to offer 1TB of storage and so I began uploading all my film photos there.
Film Developing and the iPad
There a a few apps that help with film developing by keeping and timing recipes. The obvious one is
Massive Dev Chart. It is my got for film developing. (I also have used it as a timer for paper developing by entering custom times for RC and FB papers and developers.) I typically have my iPad or iPhone next to me on the kitchen counter while I load my film reel and tank then develop as the app guides me. Useful audible queues tell you when to agitate and when each step is over. (Working in the kitchen lets me load and empty the dishwasher while I wait for the next phase.) During the wash I can take the iPhone with me so I know when it is finished.
Photo Storage and Database
I have long used Flickr to manage my photos. I keep all my scans there and index them so I can find the original negative file using a tag. With a Flickr app (
Flickr Studio) on my iPad I have easy access to my photos wherever I am. As I contemplate new images to print I browse my Flickr account and add them to an album dedicated to
print candidates. Then when I am ready to print I have my handy list of projects. I then scan them and put them in
another Flickr album.
Composition
Flickr Studio has a simple photo editing ability. I use this to try out different crops of my original image. I can also explore some basic exposures to see what I want. Once I have the composition I like I save it as separate image. The image tag tells what negative file to pull and then I load it up in the enlarger and set up the focus and my easel. With my composition on the iPad screen I can view it right next to my easel and adjust the enlarger and easel until I get exactly what I want on the paper. Since a lot of the exploring of composition and exposure work is done on the iPad this can happen almost anywhere the mood strikes me (on the sofa, riding the bus, etc). It is also a lot more comfortable and easier to visualize as the image is a positive image as well.
iPad in the Darkroom
In the past I used Massive Dev Chart as a basic timer for my exposures and test strips. It has a counter function and a metronome sound that worked very well in this area. Recently I have been trying another app called
Dark Timer 2. This app claims to manage film developing, enlarging, and paper development. The film portion I have not tried but it ties into the Massive Dev Chart database.
DarkTimer2 for Enlarging
The reason I got me interested in DarkTimer2 was the ability to manage split filtration printing which is my chosen method. It stores values for two filters A and B. Within each you specify the filter value (00 to 5 in 1/2 filter increments), f-stop, and exposure time. There are also two burn settings allowed with the same values. All of the setting are saved along with the enlarger type (for those with more than one), the lens used, paper, and a name for the print. The ability to have different f-stops for each filter and burn is a nuisance to me as I have only printed with one f-stop for all filters. These are all stored in a database. In theory this could eliminate a notebook but as I cannot export or print the internal database I am not that trusting of the app as my only means of storing notes. There are some random bugs around correctly storing f-stop values that I can't quit pin down as well.
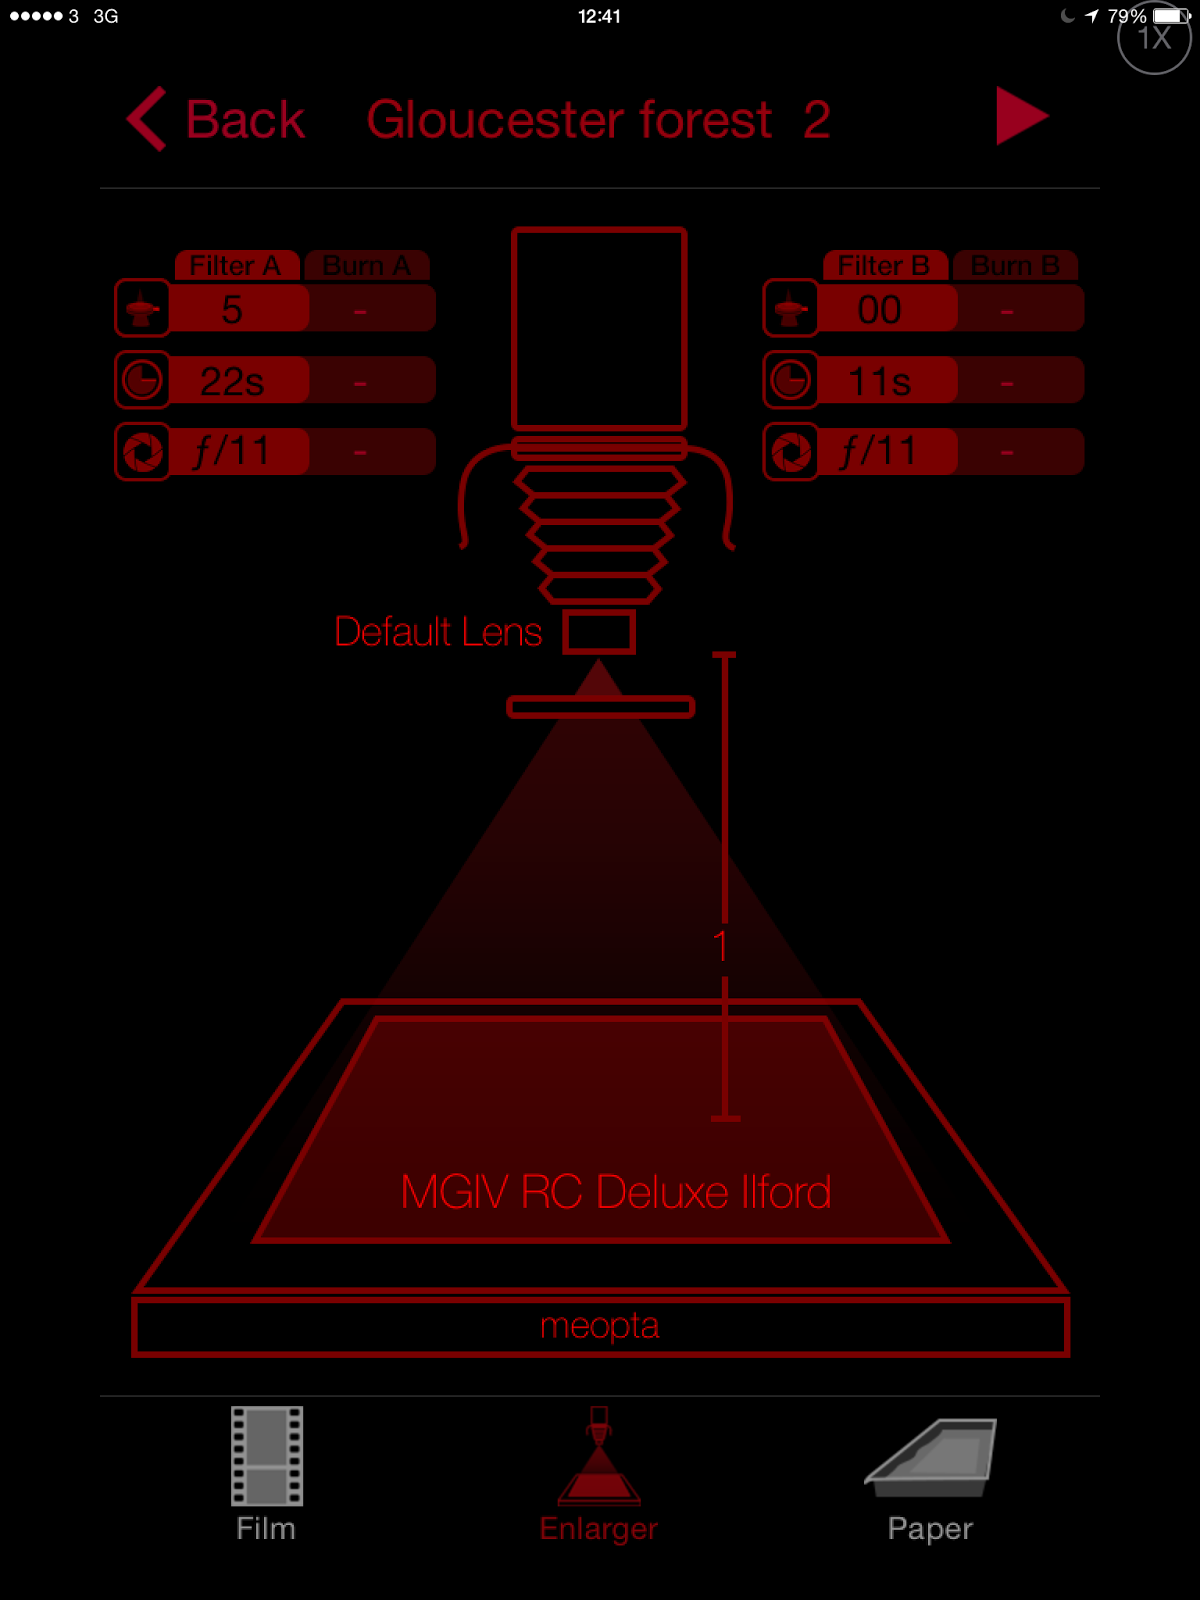 |
| Enlarger Schematic View |
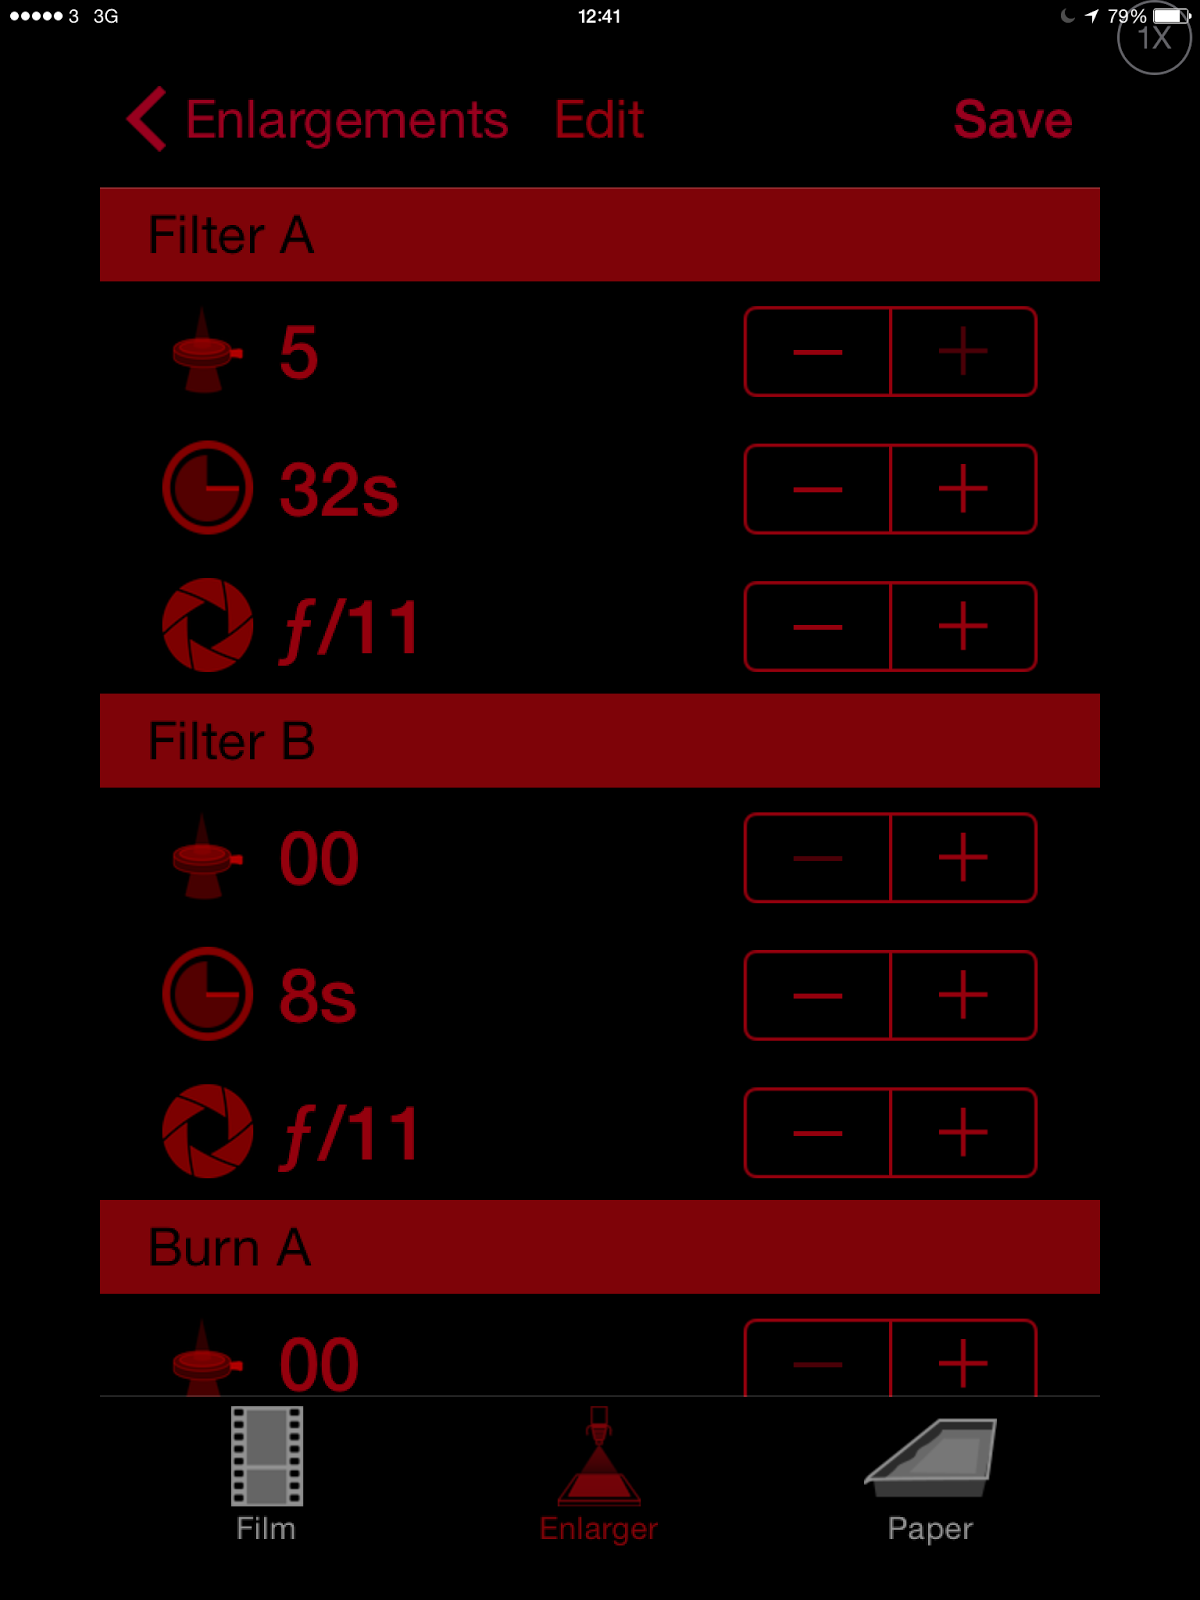 |
| Print Editing Screen (Exposures) |
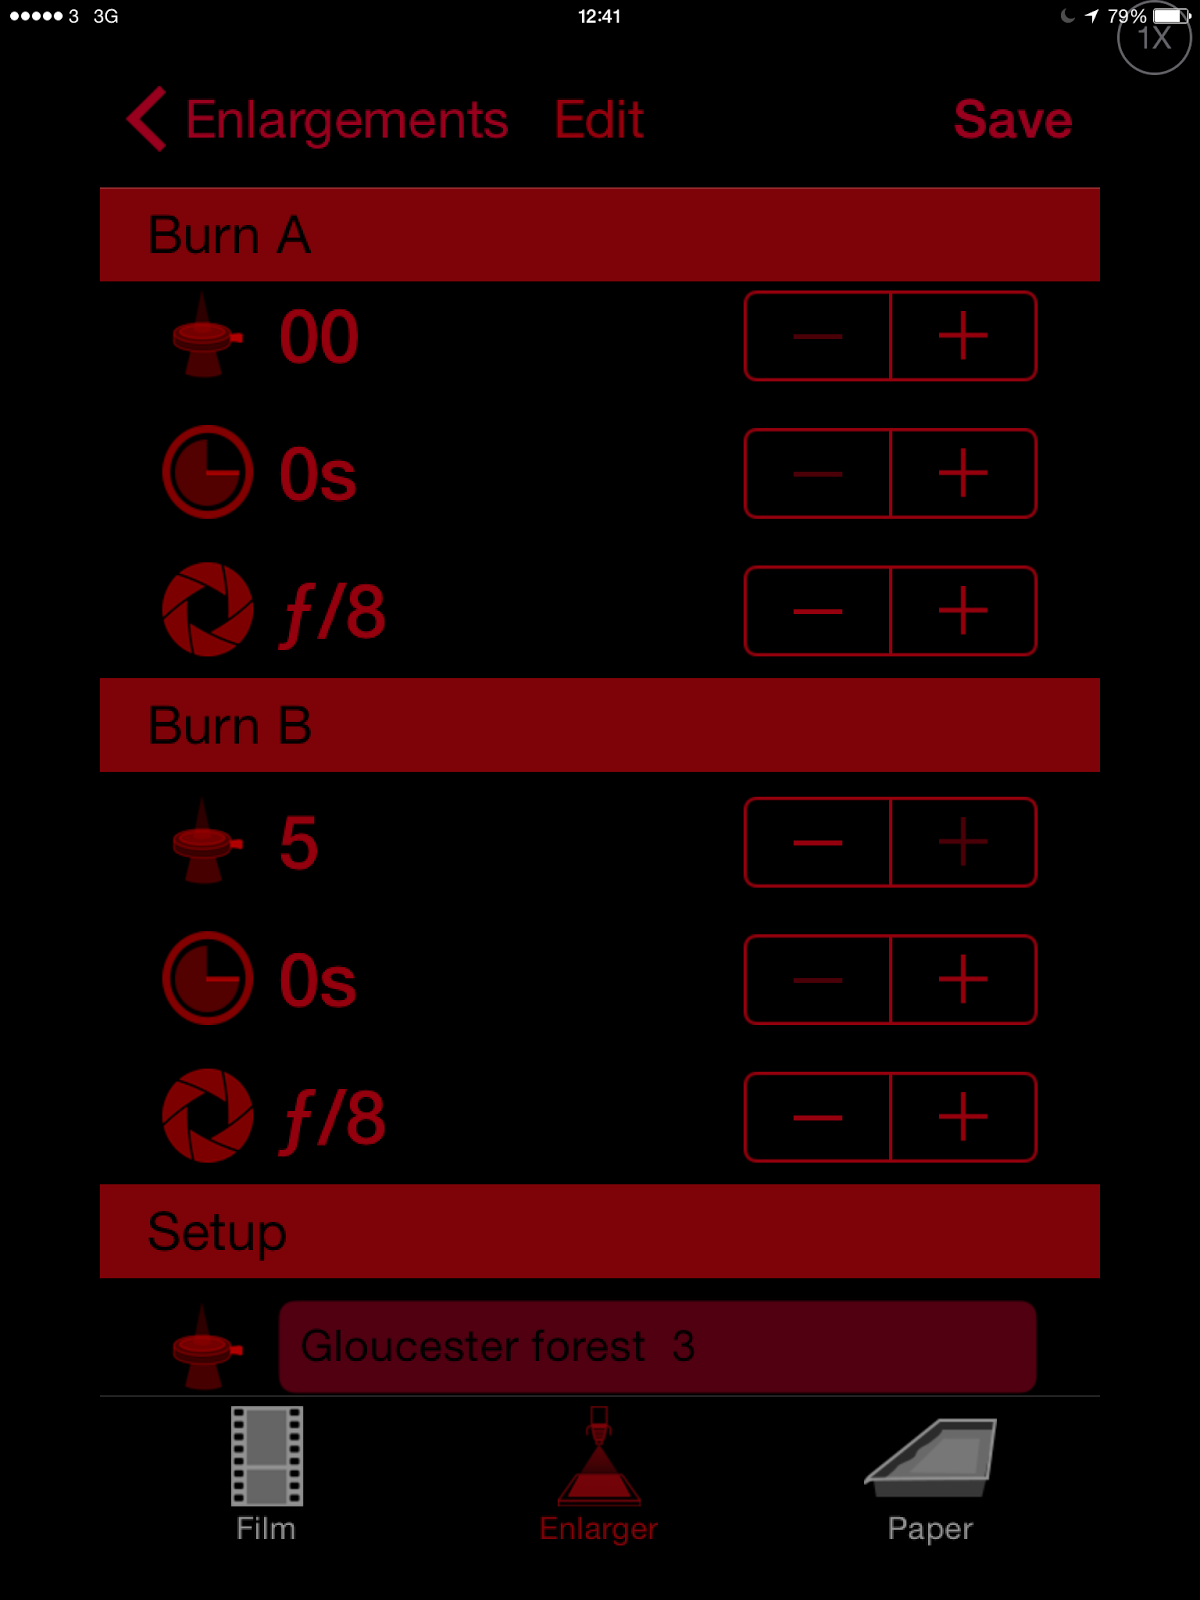 |
| Print Editing Screen (Burning) |
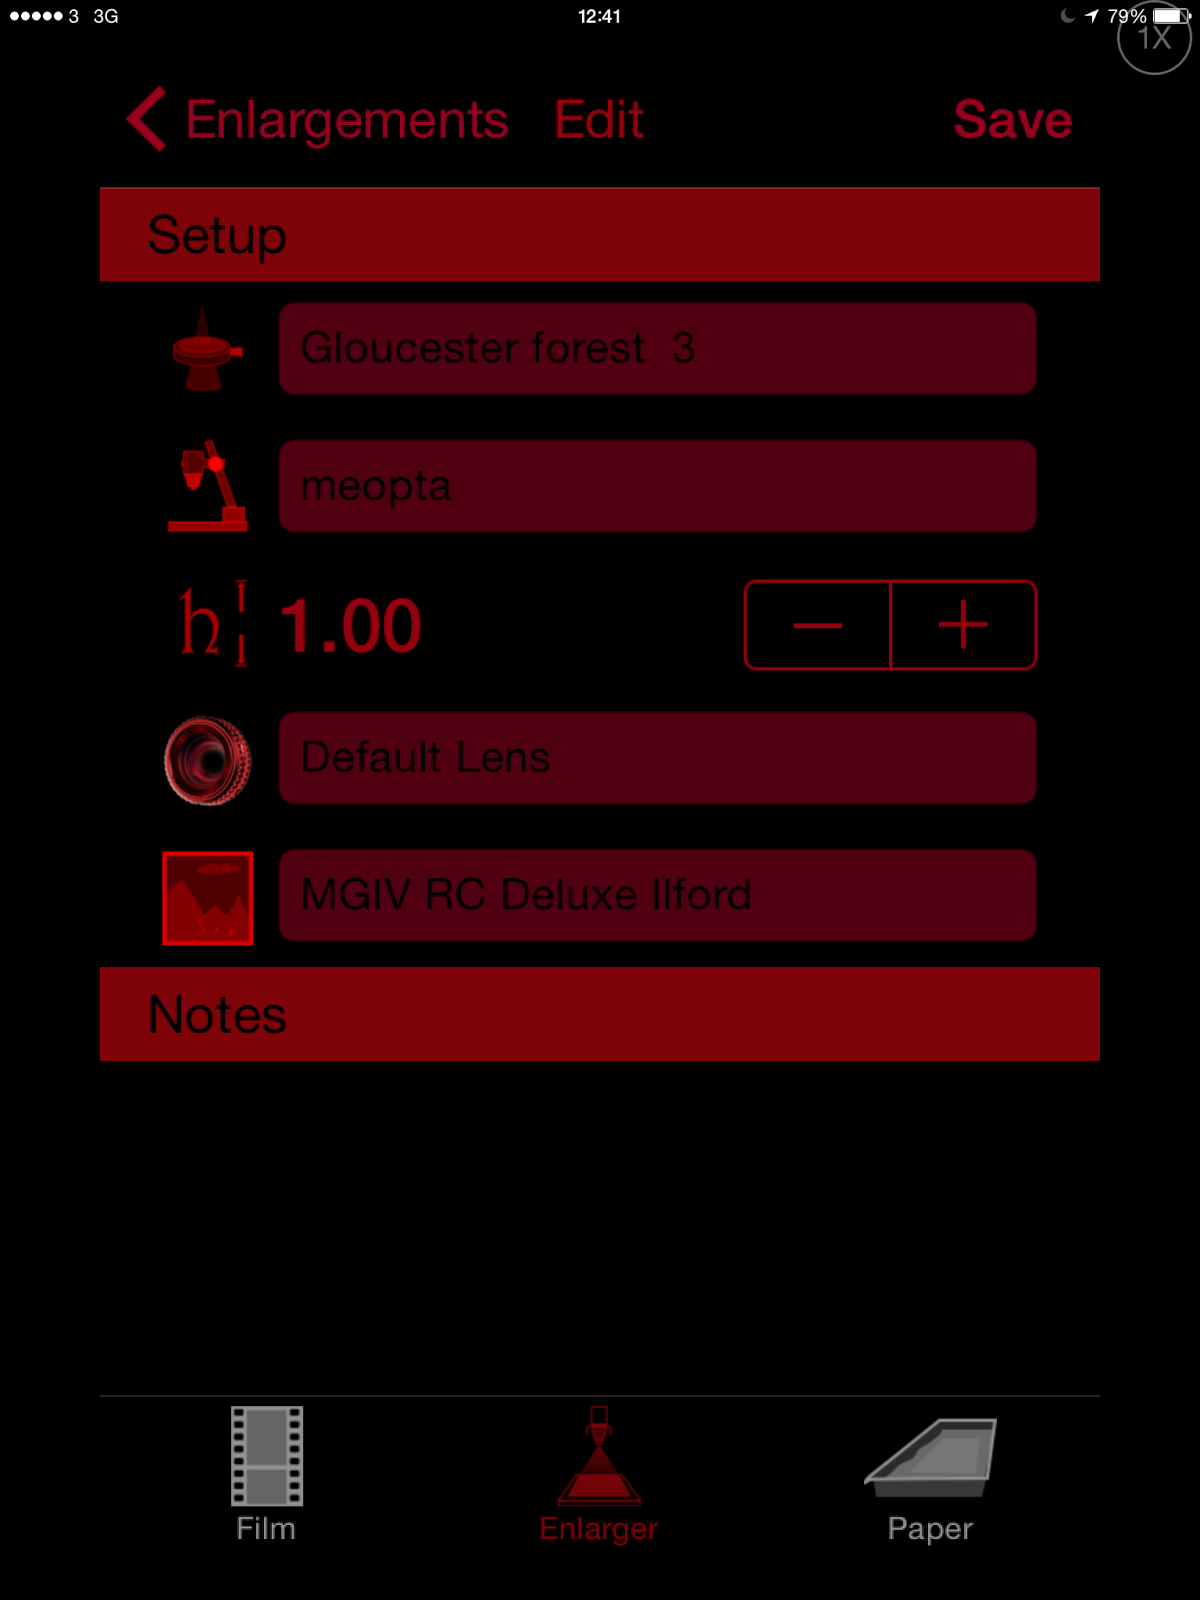 |
| Print Editing Screen (Setup and Notes) |
The interface is a little difficult to learn at first but soon enough I figured it out.
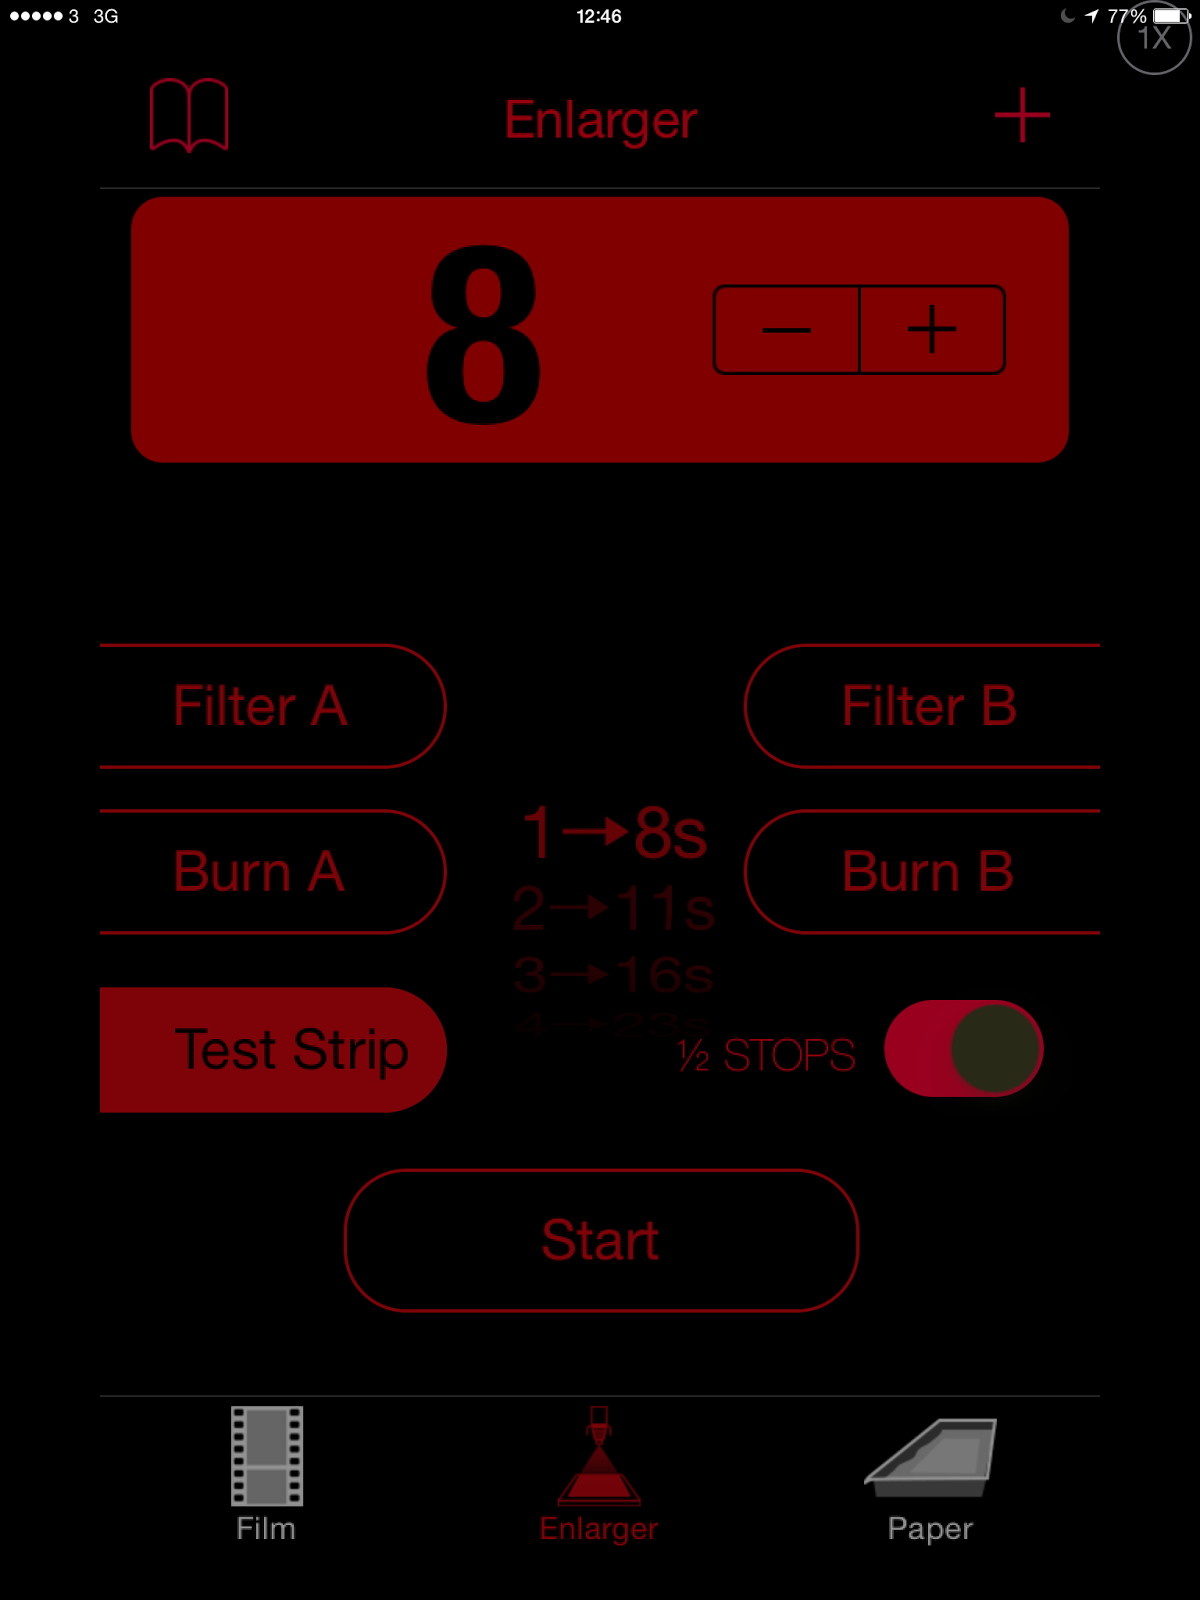 |
| Enlarger Screen with test Strip 1/2 step options selected. |
There is also a test strip mode that does the timings for the test strips. Again this took some time to figure out. To get there I find it works best from the enlarger screen to first select Test Strip. Next slide the button for half steps to on. I then press the + button to get to 8 seconds in the large red box at the top. (I typically run my test strips from 8 seconds to 64 seconds in 1/2 stop intervals.) Assuming I have setup the enlarger and negative already I place the test strip under the enlarger and prepare my masking slide to cover the print. At this point it is a good idea to remind yourself to turn on the iPad speaker volume and turn off the mute function if it is on. Otherwise you get no audio notifications which is what makes this work well as you can keep your eye on the easel and not the screen. I turn on the enlarger and tap the start button at the same time.
The larger counter counts down and a tick is also heard on each second. When the first interval is reached after 8 seconds a different tone sounds. This signals that it is time to move the masking slide to cover the first portion of the paper. The counter continues counting, from three this time, corresponding to 11 seconds exposure and again the tone indicates the time to move the slide and cover more paper. These intervals continue until you decide you have had enough.
At this point I have the first difficulty with the software. Since the counter shows a count down to the next 1/2 stop interval it is difficult to know where you are overall. Now if you mark the photo paper with lines to indicate each interval ahead of time then that will tell you (I don't). Otherwise you have to do some quick mental maths or count the number of tones you get to total to the last test exposure interval, Neither I find easy to do while I am focusing on making precise slide movements. When I see a 13 at the start of the count I know I am doing the 45 second exposure and hence have one more to go. I think I would prefer to it count up for the total time though.
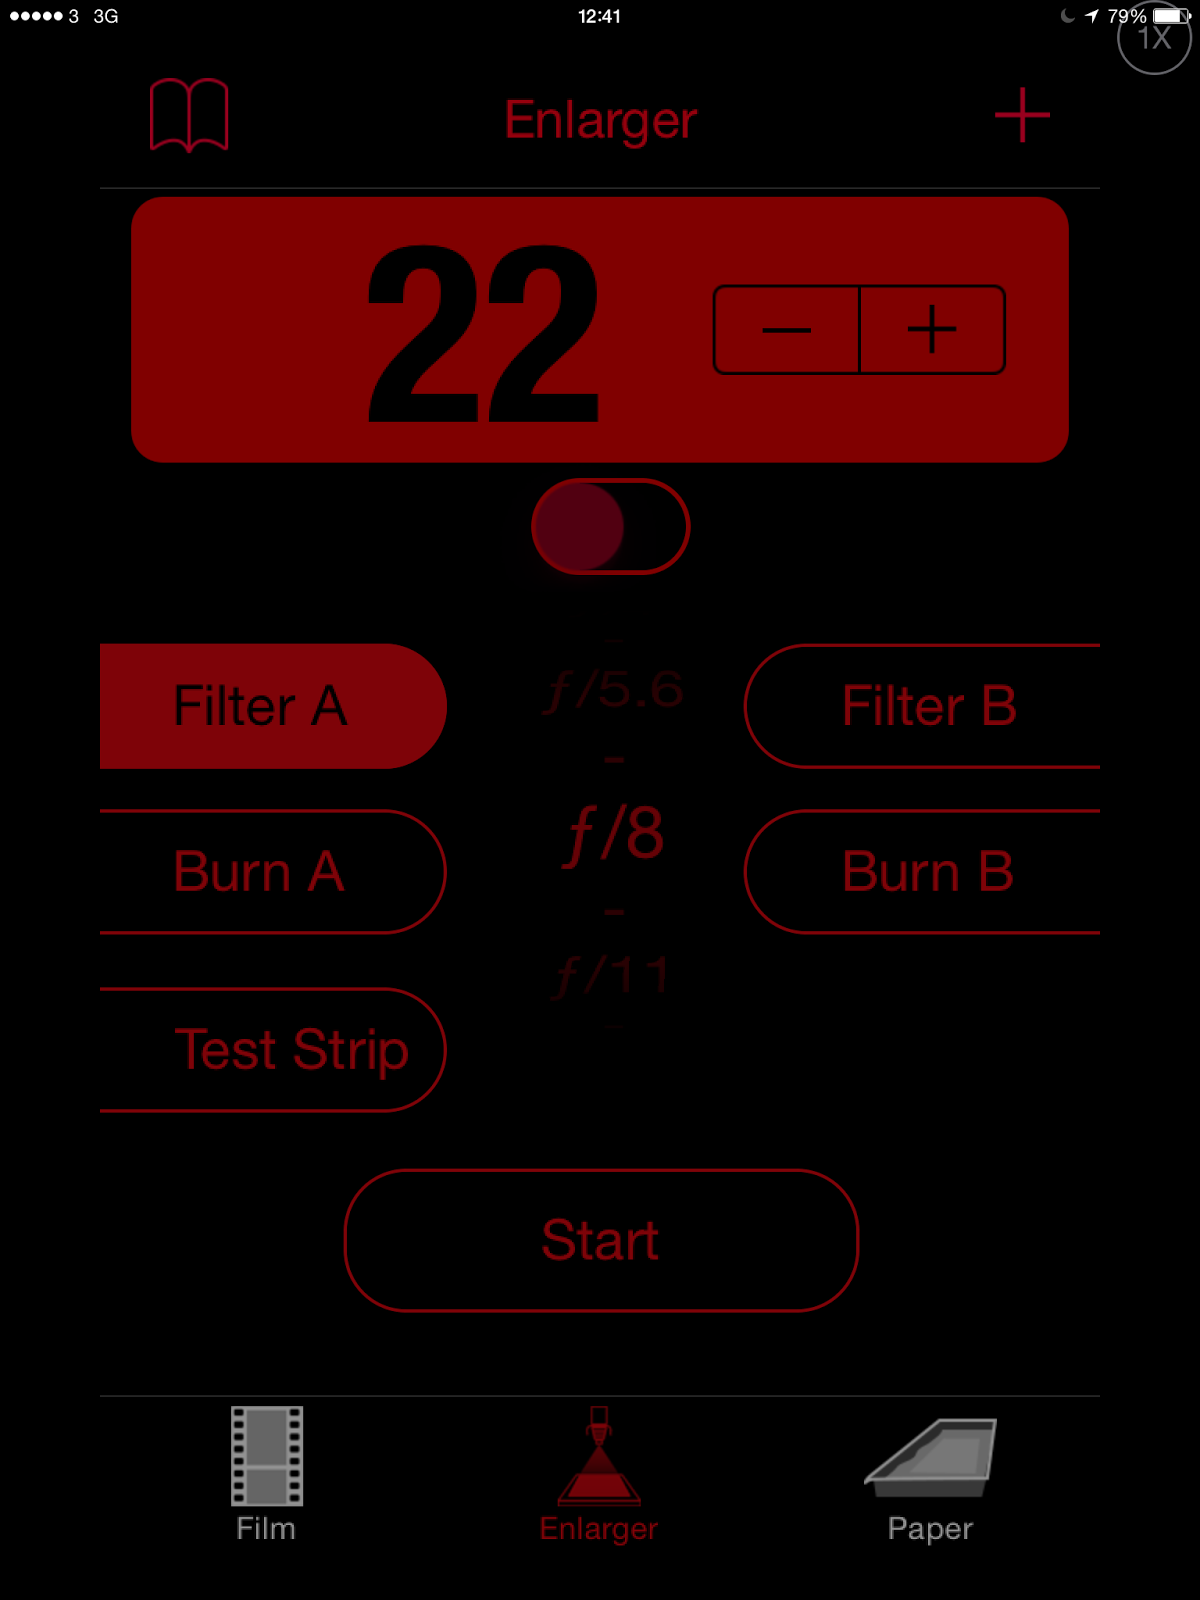 |
| Enlarger Screen for Split Filtration |
Running the App for printing is straightforward. You select the filter first (A is my #5 filter), the time is displayed above and you can adjust one more time with the +/- buttons. Assuming the enlarger and paper are setup; press start at the same time as turning on the enlarger. The timer counts down with a metronome and a final gong to indicate the end of the interval. Change the filter in the enlarger, press B (#00 in my setup) and start plus turn on the enlarger again to expose the other filter. There are two Burn buttons that work in a similar way.
Developing Paper
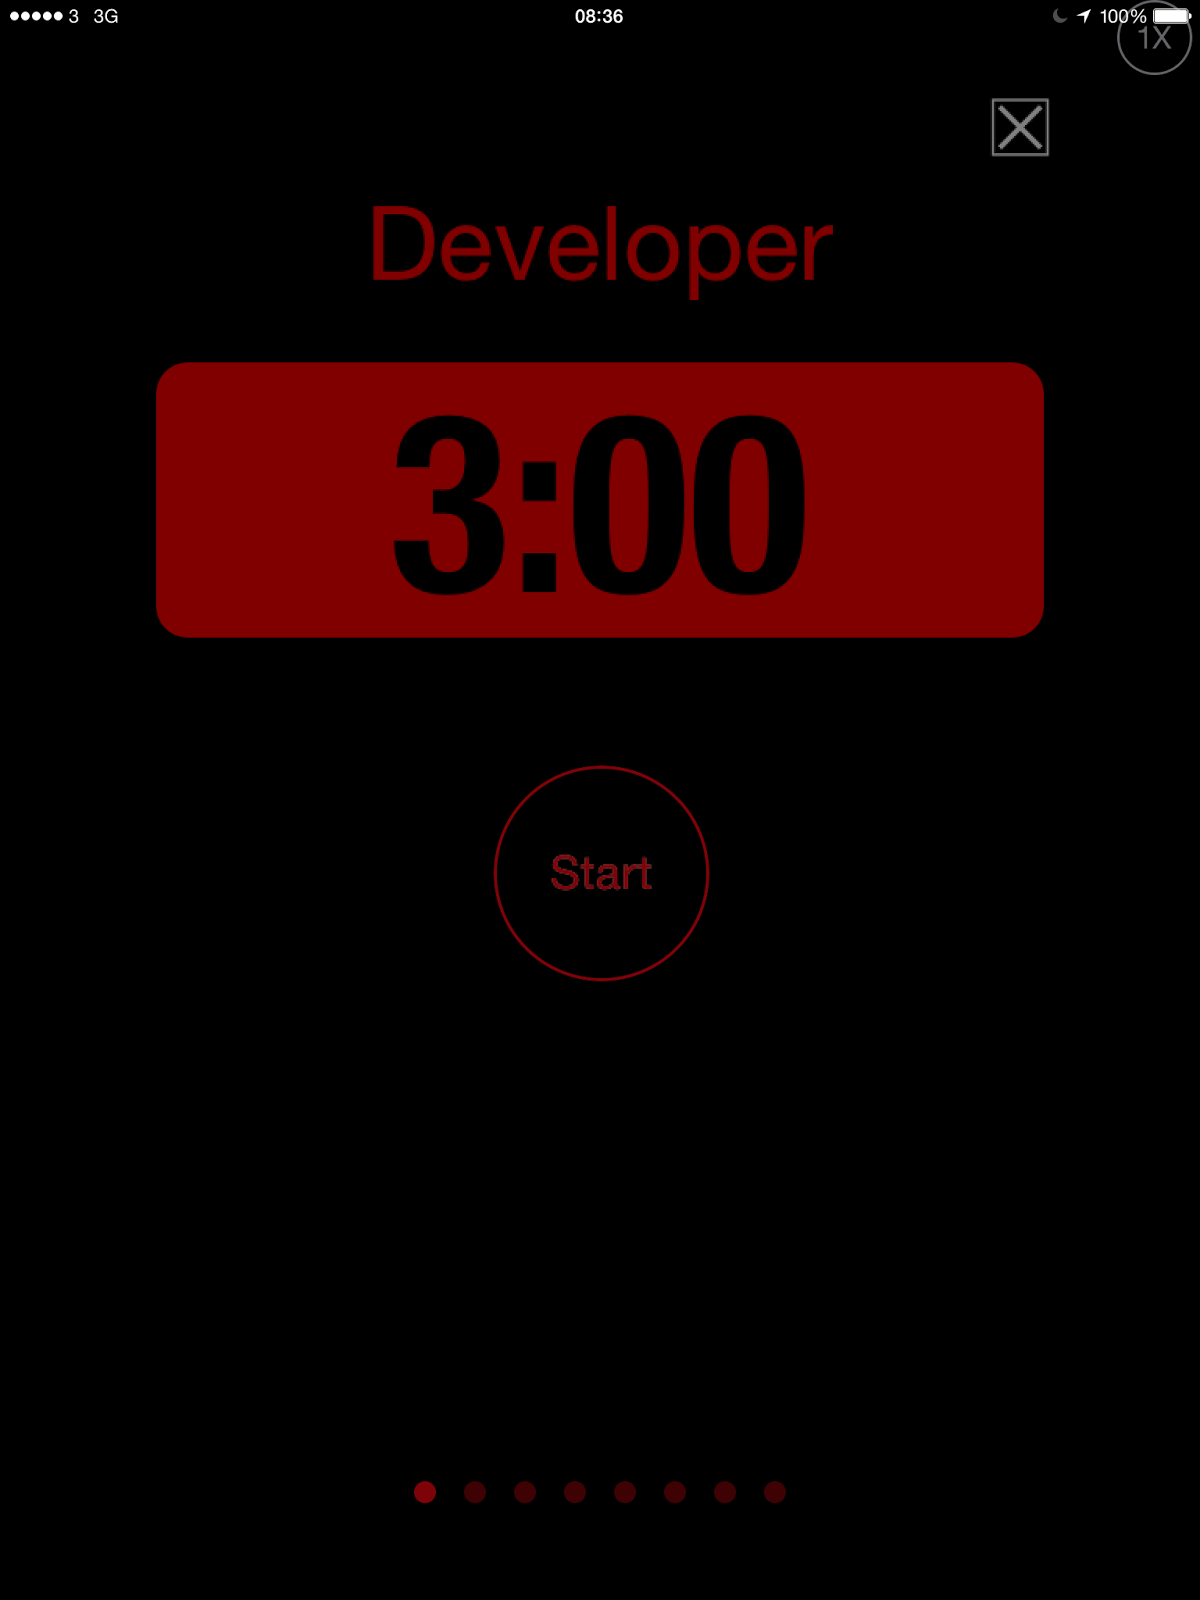
Now one is ready to develop the print. tap the Paper section on the bottom right corner of the page. This displays the rather simple setup of the paper section. Basically it is a sequence of steps executed linearly which you can label and assign time intervals to. You can also specify to stop at each stage or move immediately tot he next phase. The typical stages are Develop, Stop, Fix, Wash. You can add as many steps as you wish to suit your flow.
The limitations are that you can only specify one sequence. This is a problem if you develop both RC and Fiber paper or if you have different developers that require different development times. I solved this by making two sets of different Develop, Stop, Fix, Wash, sequences. Once you hit play you can swipe to the next step so accessing the second sequence requires four swipes to get there. I also make the sequences stop at each stage as that works best for me. These sequences are shown below.
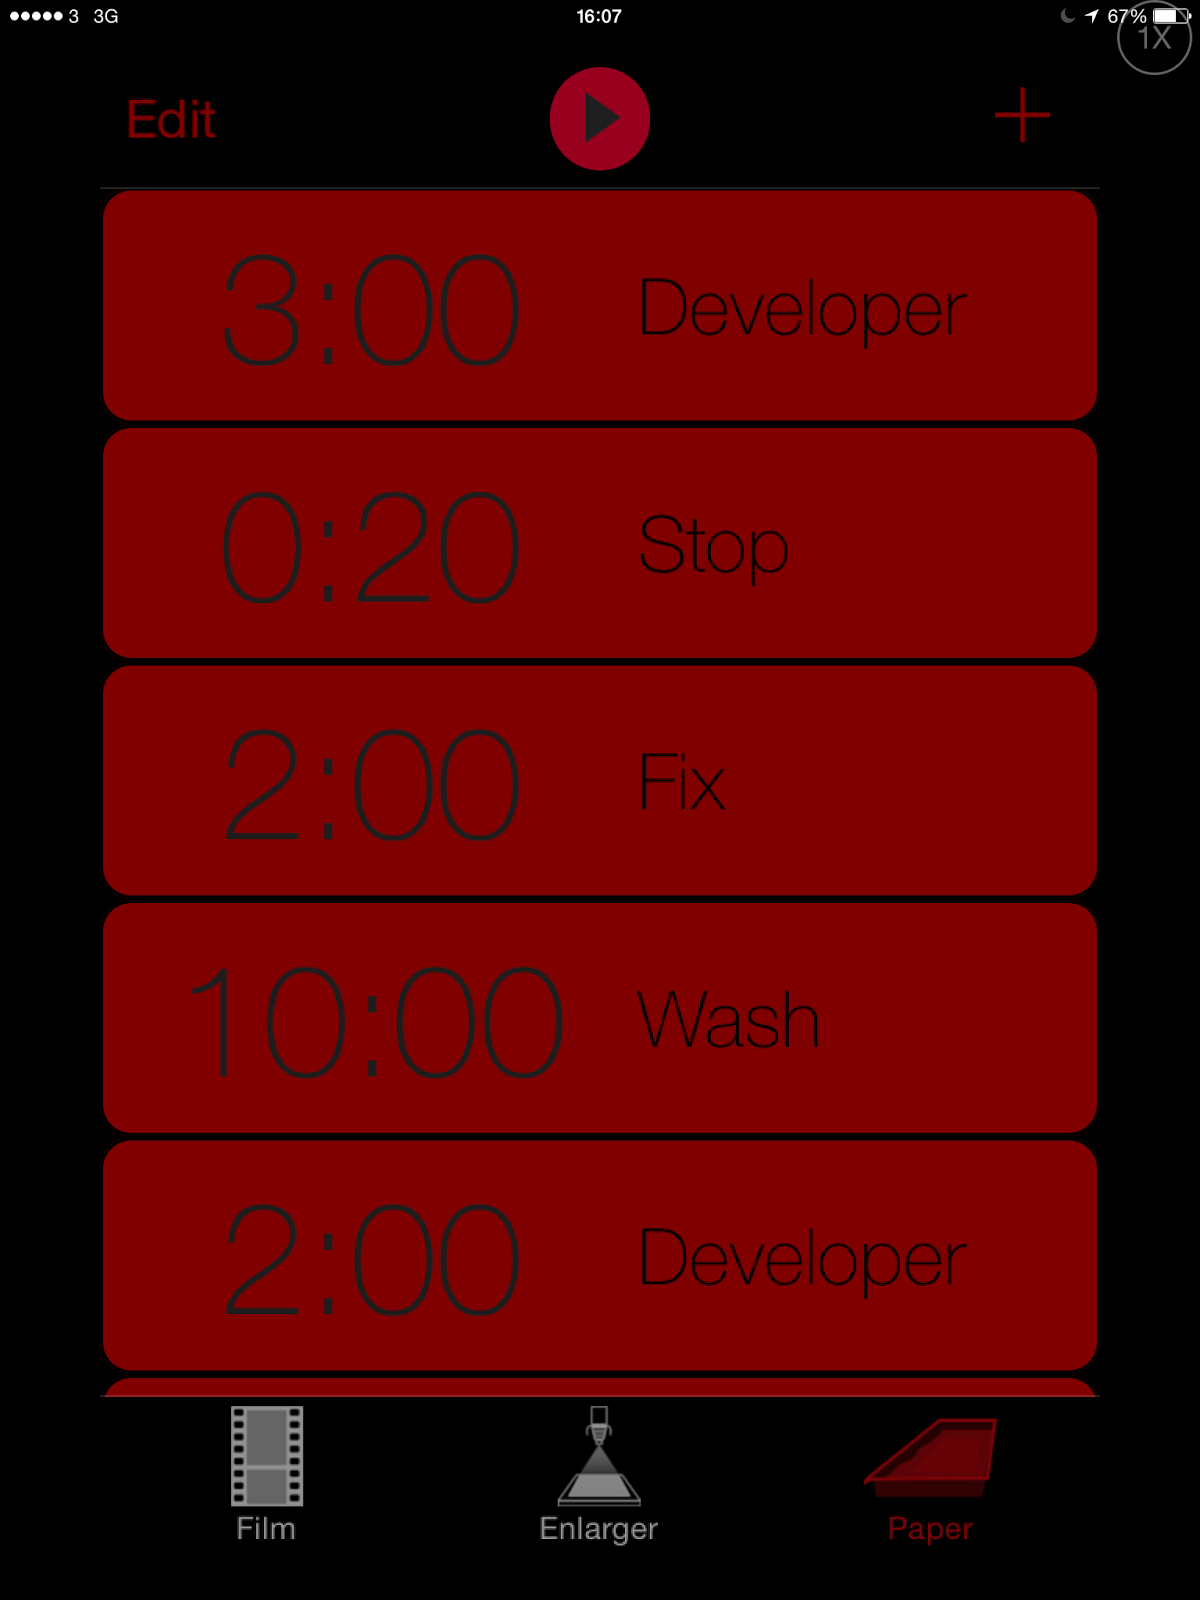 |
| First page of paper development sequence. Developer at bottom is start of second sequence. |
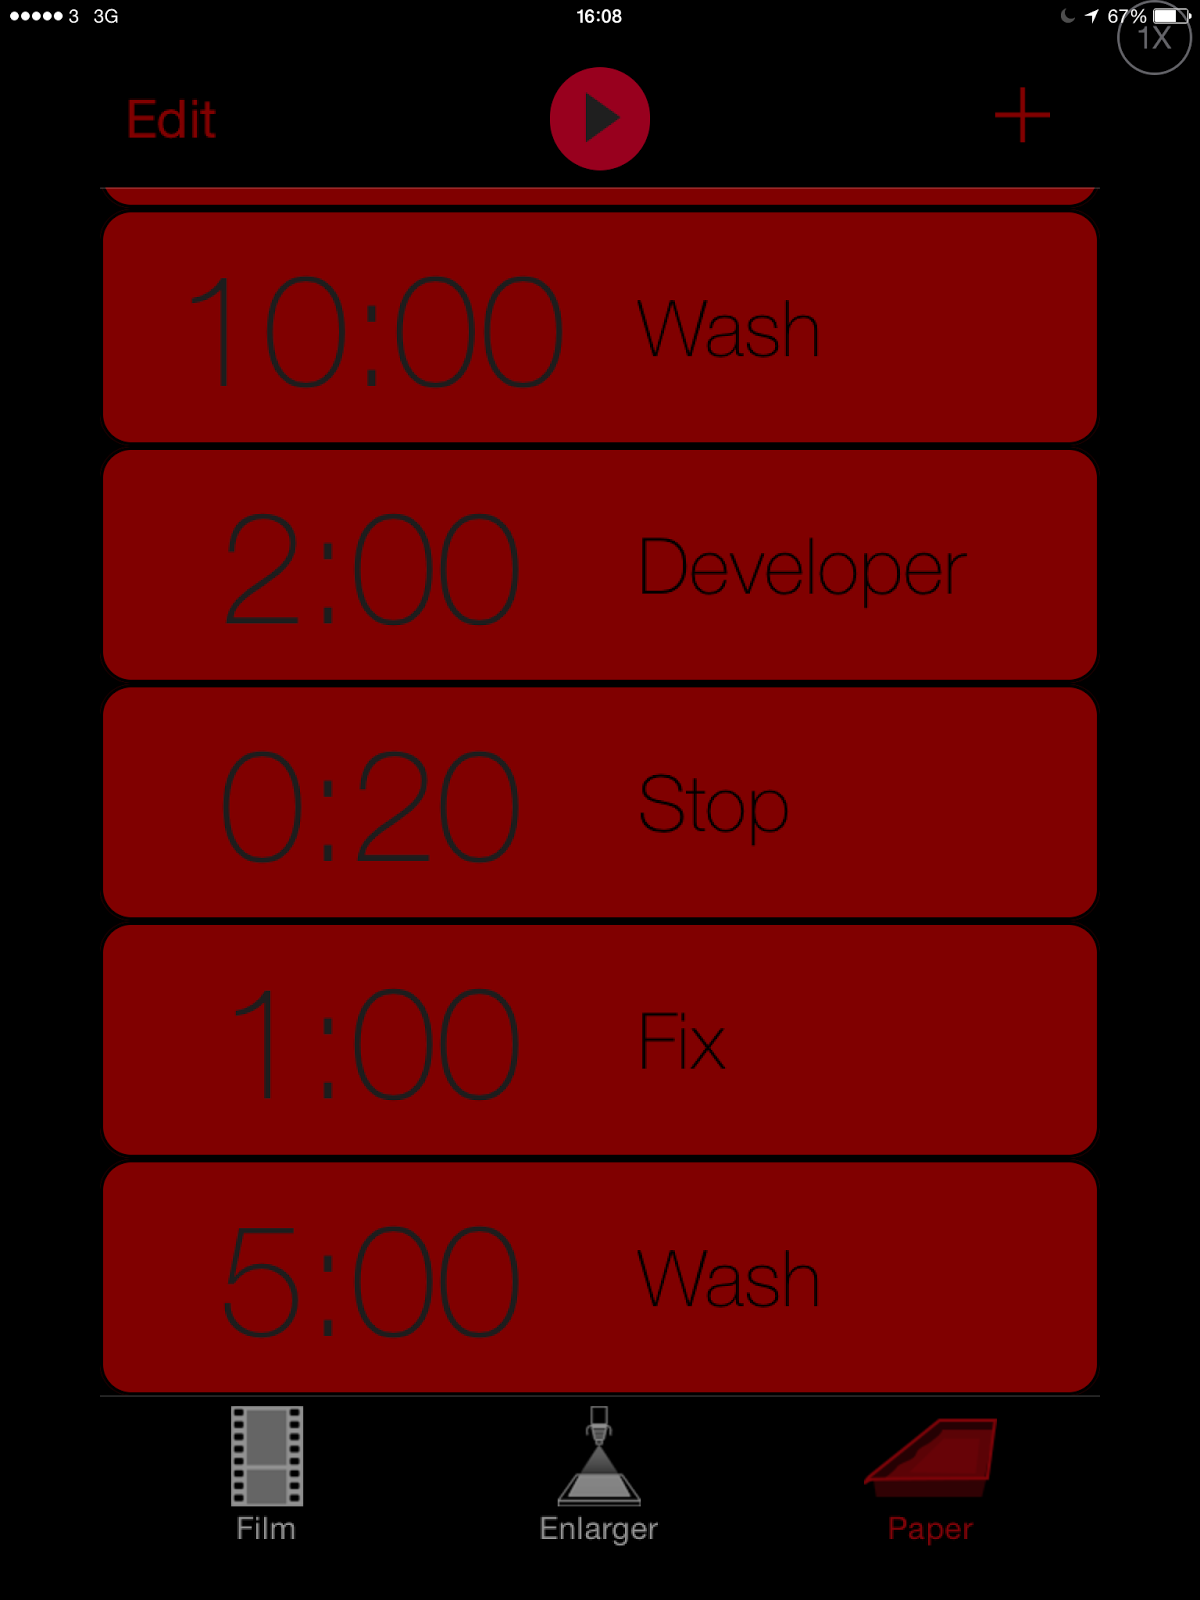 |
| Second sequence. |
 |
| Developer Timer (Note dots at bottom indicating you can swipe tot he next screen) |
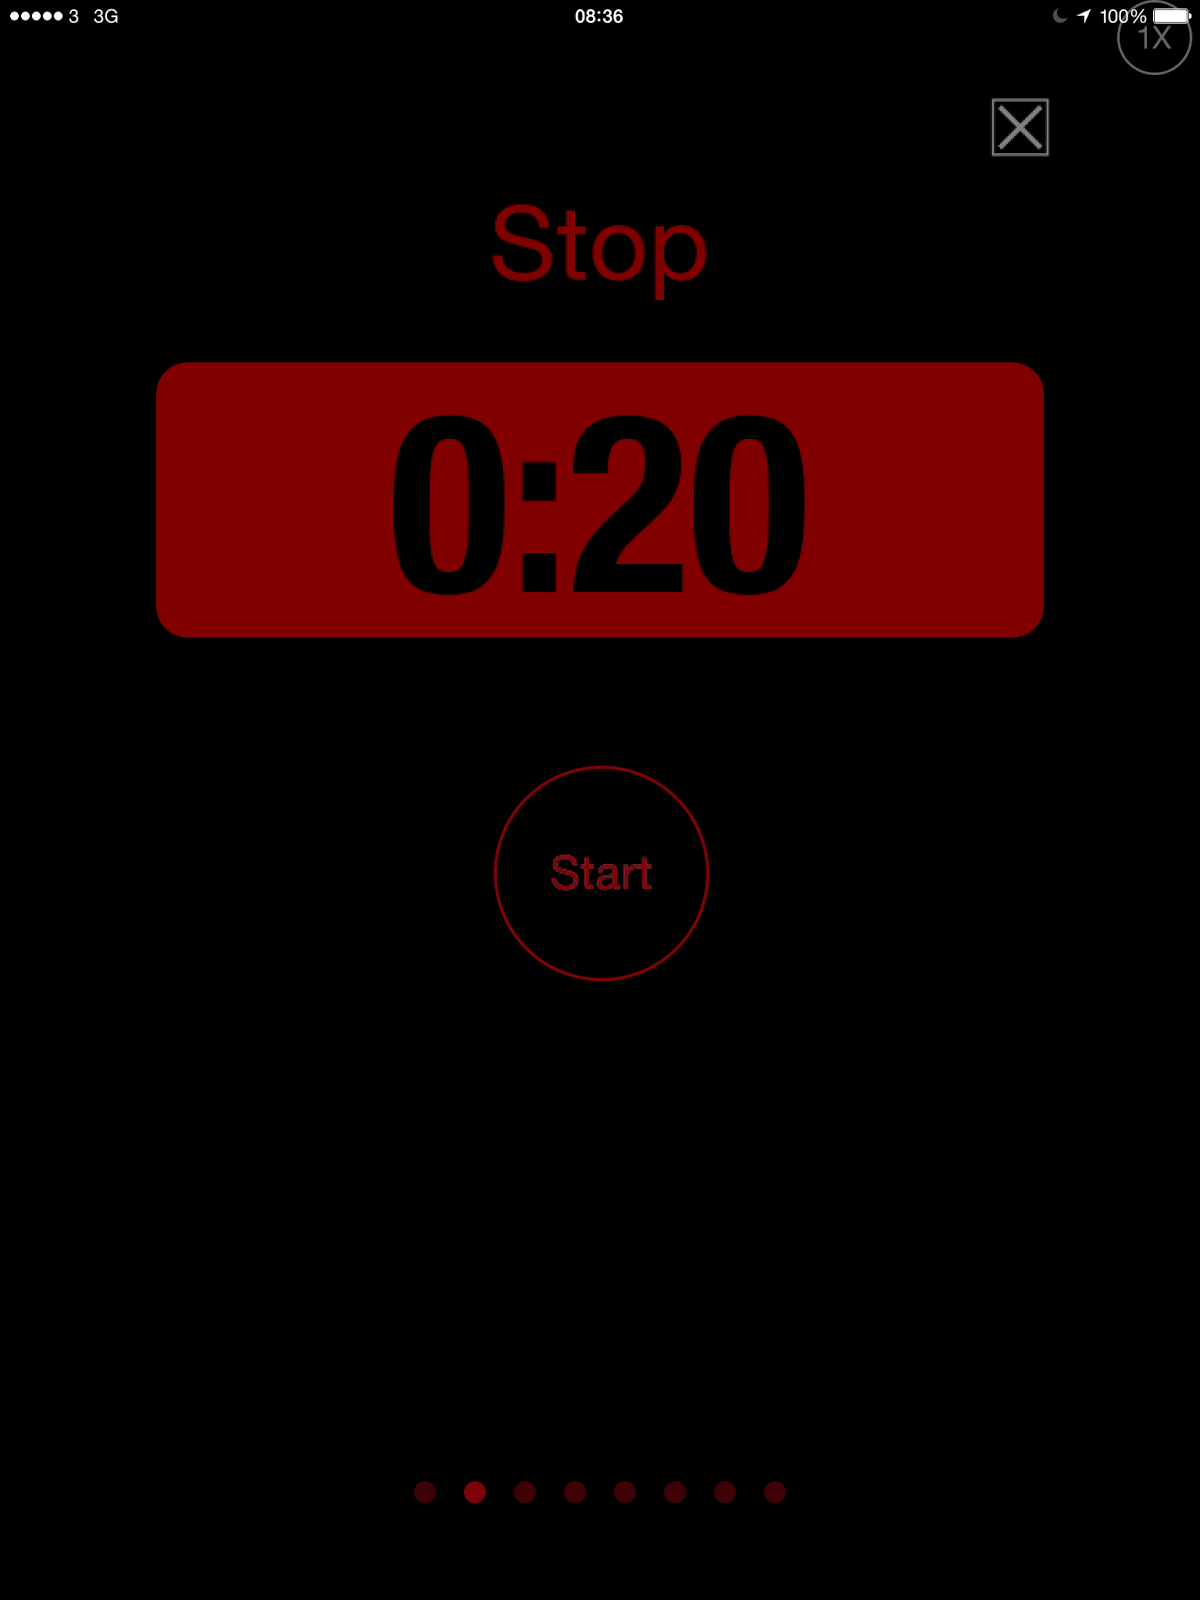 |
| Stop Timer |
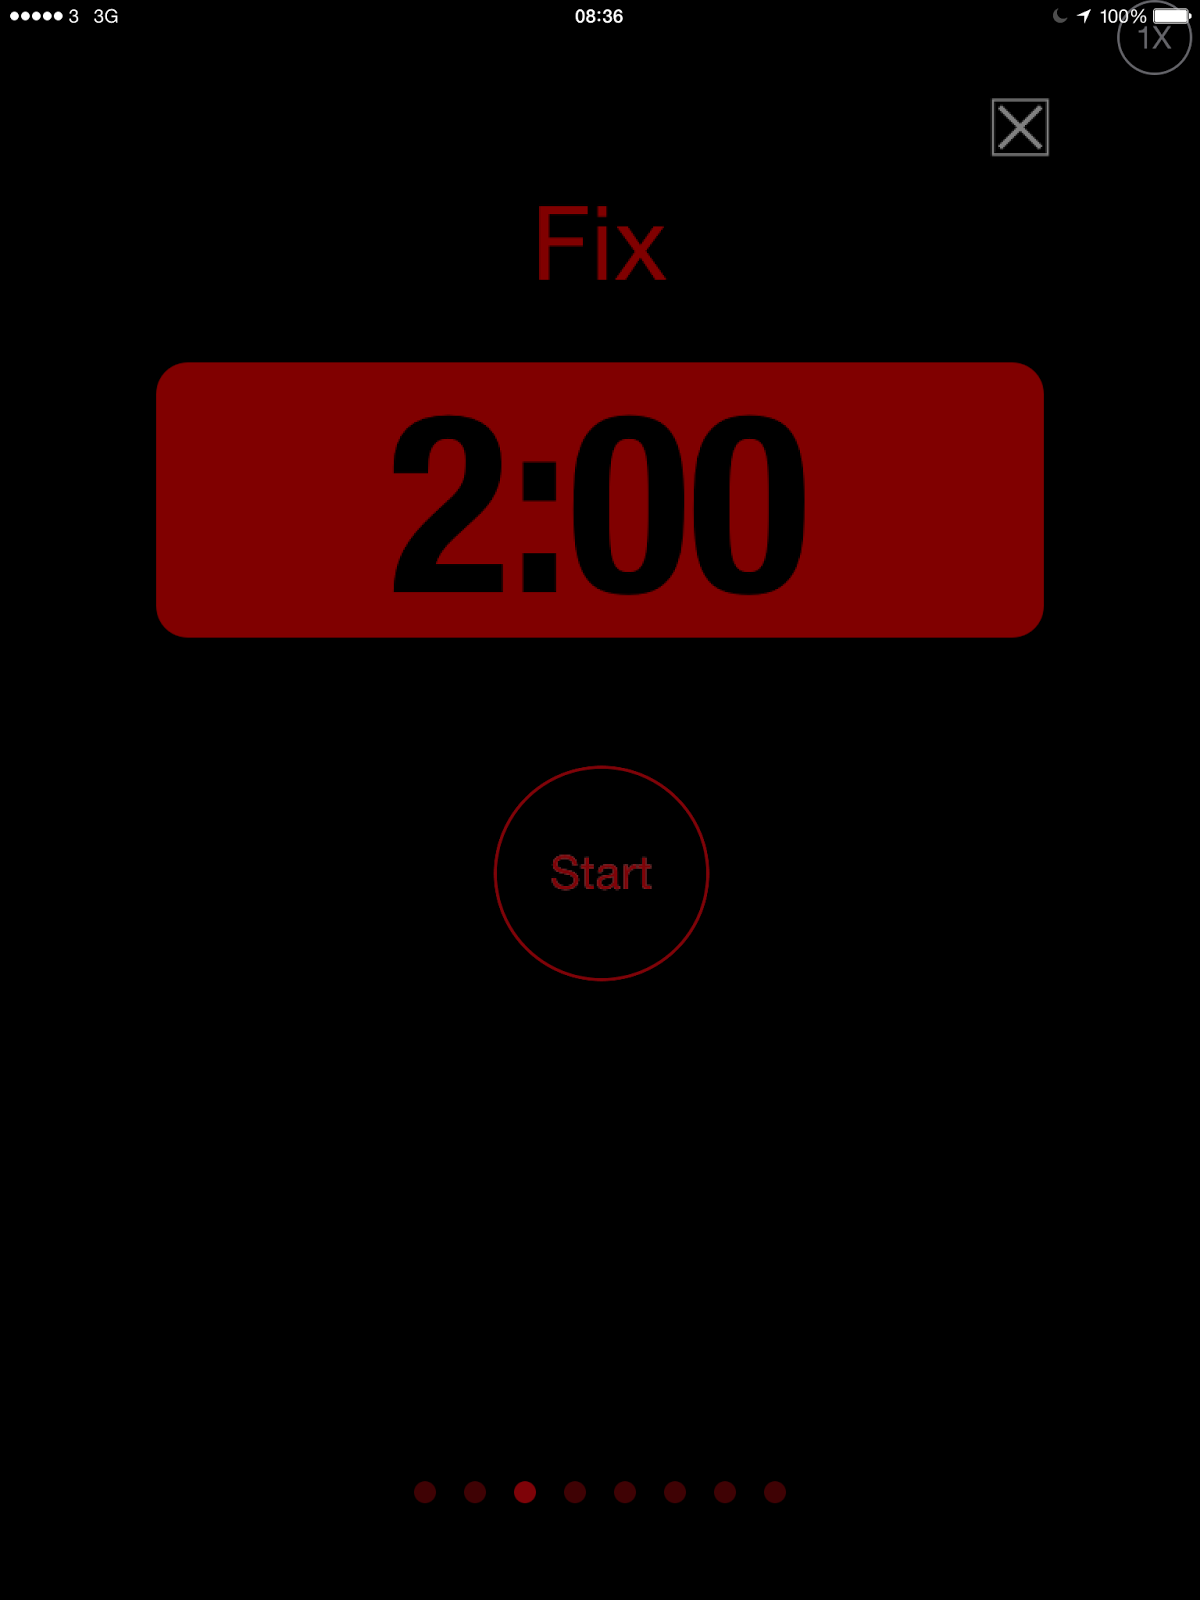 |
| Fix |
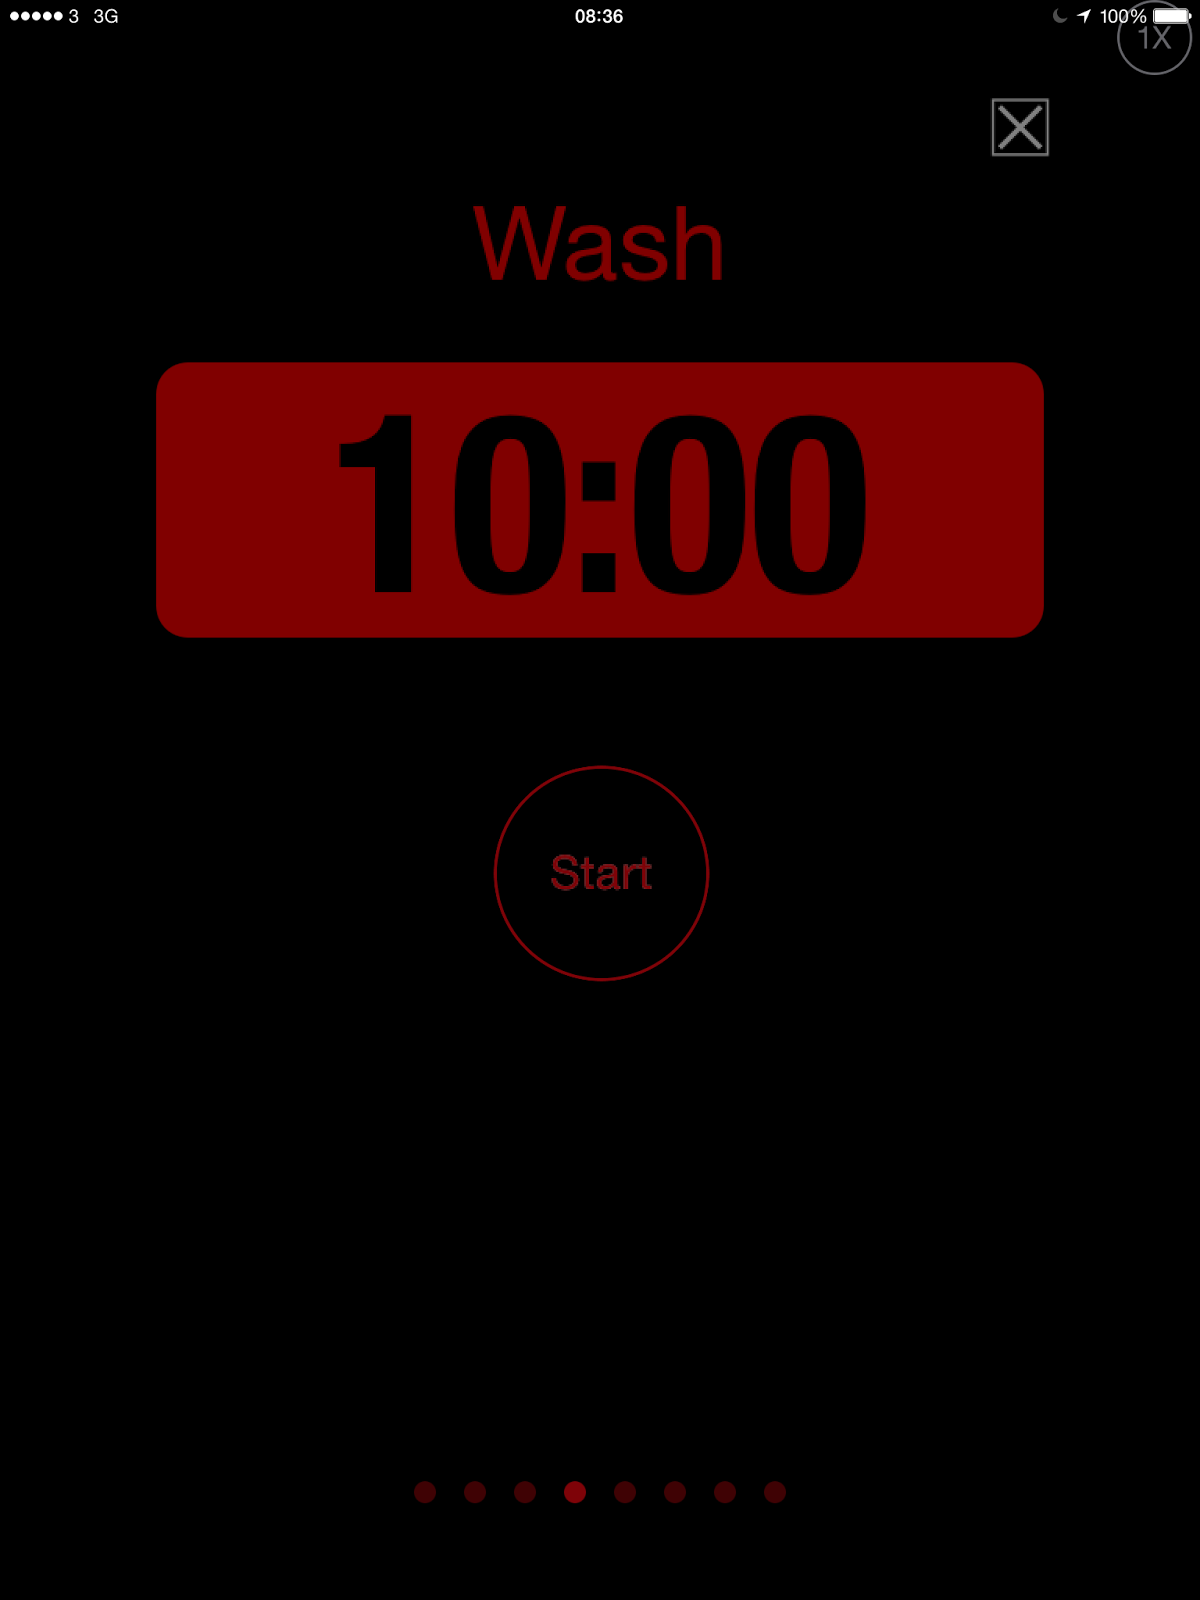 |
| Wash.Here you can flip tot he next time which starts the next sequence in my setup. |
Overall the tool works pretty well. I don't have a darkroom timer tied to my enlarger and though I am looking I really want one that handles split filtration (2 timers) and there is only one I have found yet and it is very expensive. I may get two cheaper ones but they all take a lot of room. It would be good if the Dark Timer 2 App had a Bluetooth peripheral to control the enlarger. I have also considered an Arduino project to make such a timer but I don't have the motivation yet. DarkTimer2's database of prints is useful but it needs to sort by most recently used. As you add more prints the most recent ones show up at the bottom and one has to scroll down to find the one you are perfecting each time you make adjustments..
Comments