Posts

Showing posts with the label ECO4812

Double Vision

Image
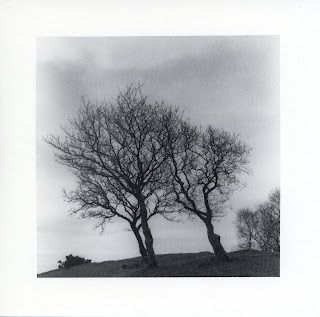
While making a print earlier my first test strip moved during the exposure of the test strip. In looking at it more I decided I liked it. The subject was the three trees from North Wales.  Original print The test strip is here below.  Inspiration! I decided to try this formally as an image. I considered how to shift the image. The shift in the test strip was from flattening the curl in the paper. This has the potential advantage having the two images pivot from the ground. I rejected this though as it seems harder to control and there will be a loss of focus. Still it is worth thinking about as the result may appear more like a shadow which could be useful. I decided on a simple horizontal shift. Since the original print was almost entirely the full horizontal range of the negative I needed to create some space for the shift. I cropped the image in tighter to make room. Since it is a square image I lose some sky but I shifted the crop up to have less ground in the foreground....

Making Notecards in the Darkroom

Image
Introduction During the last few days as I have been making and toning images on Ilford MG Art 300 paper I got the idea that the paper has such a nice weight and feel it could make good note cards. Pursuing this idea I started with the Gradient Birch image I have been using lately. Needless to say I like the image a lot. It is also easy to print as it doesn't require any manipulations like burning or dodging. Since I plan to make a lot of these I didn't want an image that is complex to produce. Blog Post Cover Image Card Layout: Deciding on a Size I started out with the 12 inch x 16 inch dimensions of the paper I have. A reasonable card size is 4x6 inches folded from 4x8 inch paper. I can get 4 of these from a 12x16 sheet. At £3 a sheet it is less that £1 cost for each card. I then have to figure the image size and aspect ratio and borders. I doodled on paper starting with the 3:4 ratio of the 4.5 x 6 cm negative. Not surprisingly 3x4 inches works nicely with fat borders. These...

Sepia and Sun Toning in Practice

Image
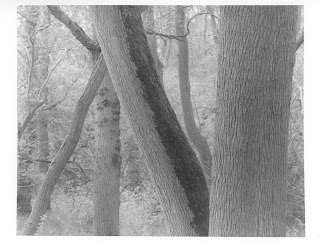
I set out to apply some of the sepia toning work I did to a good print rather than the test prints I was experimenting with.  Original Print Gradient Birch I started with Wood Walton Gradient Birch. It has some very subtle layers of tones. When I originally printed it I had a lighter and a darker version. I decided to use the darker exposure as most of the time if bleaching is used the image loses some of the original exposure.  I made 3 prints in this fashion with this exposure with 3 minutes Eco 4812 development, stop, and fix. I then washed for 5 minutes, hypo clear for 5 minutes and wash again for 5 minutes. A fourth print I doubled the exposure. This one was part of a my plan to try the sunlight toning I developed in a previous post. I speculated these would benefit from extra exposure due to the deep bleaching.  So I settled on the following set of prints to try.  1) Simple Sepia: Normal exposure. Tone Sepia only nudge it warmer at 2:00 minutes in 1+100 Sepia...

Bleaching + Sunlight = Toning?

Image
Introduction During my prior post on Sepia toning I had a thought about bleaching somewhat unrelated but inspired by  the moment.  I was inspired as I was taking photos of the prints in the bright sun after bleaching and I was aware that the ultraviolet from the sun was probably 'printing out' the image much as a lumen print does. (Ultraviolet light is energetic enough to leave metallic silver that makes a visible image.)  Naturally as this was a bleached image it would only print out the silver in areas where it was left in the latent image. The non-image silver had been removed by the fixing stage.  Original Image (note lack of density in upper and upper right of image) So I took another test print with good densities and endeavored to bleach it back as far as possible. This I did with 7 minutes of potassium ferrocyanide 1+9 solution. What remained of the image...

Printing Monk's Wood: Monk's Path

Image
Introduction Yet another print from my April collection of images from Monk's wood. This one I call Monk's path as it has one of the many paths there in the frame below an old gnarled oak tree. The tree and the leading line of fence posts is what caught my eye. The day was early spring and without tree cover or clouds the shadows were quite harsh and resented a small challenge to print. Blog Post Cover Image This print like the ones I have execute recently are on Ilford MG ART 300 cotton rag paper.  Monk's Path I started with soft filter test strip at f16 f16 #00 Filter Test Strip This leads me to think 11 seconds gives the right notion of tone I want. Next I decided to merge my first soft filter full print with the hard filter test print. I am aiming to complete this print in the 4 sheets I have left from this box of paper hence combining some steps.  Hard Filter Test Strip f16 #00 11 seconds# 5 test From this I think my soft filter choice is too light. The bottom 2 inches...

Printing Monk's Wood: The Brothers

Image
Introduction As I resume my printing for this summer after a long hiatus I come to the next image I want to print. Taken in early Spring (April) the trees were just starting to leaf out at least the early ones like the blackthorn and birches. The bluebells were emerging and the grass was greening up. The canopy was quite open and many of the images are not much different than they would have been in winter.  I shot this with my Mamiya 645 medium format camera on Ilford HP5+ 400 speed film. I was experimenting with my 150mm lens which is more telephoto than I normally shoot landscapes with. I have learned a lot about this lens and have been using it more as a result.  The first image I called 'The Brothers'. It came to me as a metaphor for the different trees being together for so long and being of different ages.   Blog Post Cover Image The Brothers I am on a run of printing on Ilford MG ART 300 paper. A heavy cotton rag paper with a deep texture and good tonal range...

Printing Holme Fen and Woodwalton Fen: Continued...

Image
Introduction I left yesterday's printing with the disappointing revelation that 4 sheets of my Ilford MG Art 300 paper had apparently become fogged. This cost me not only time but money owing to the expense of this cotton rag art paper. Blog Post Cover Image I had done pretty well yesterday with 2 good prints only consuming 6 sheets of paper. I was part way through my 3rd print for the day when I noticed the fogging and packed it in. Here is where I got to yesterday.  Reed Seed Head I started with a soft filter test strip. The subject is a seed head from a reed that grows in the waterways at Woodwalton Fen. I like their delicate fronds and they are iconic of the Fens as they exist in most waterways and the reeds are used for thatching roofs. I keyed off the previous prints and so kept the enlarger set at f11. f11 #00 test strip The test strip did not alert me to any fogging problems. So I set about estimating an exposure at 24 seconds. I want the fronds to standout being very ligh...