Posts

Showing posts with the label landscape photography

Film from Digital Prints: Comparing Ilford MGFB Classic and Fomatone MG Classic Warmtone

Image
I have been experimenting with Fomatone MG Classic Warmtone paper recently. I have found it has a pleasing look when developed in ECO 4812 which is not a warmtone developer. It maintains a warmer tone that can verge on green in some light. I do not like green toned prints and have remained confused as to why this is considered a warmtone.  However this paper has grown on me. Along the way I have tried some toning, and this can clean up any residual green tone if it becomes too bothersome. The paper tones well in sepia toner if more brown tone is desired.  As part of this process, I decided to investigate the same print on Ilford MGFB Classic which is a neutral to cold tone paper. This is my usual paper which when developed with Eco 4812 developer has a nice neutral tone. This paper does not tone well in sepia . A very small amount of sepia takes the colder 'edge' off the print, but further toning gives a cloying pinkish tone. As an aside Ilford MG ART 300 paper gives a much ni...
Film from Digital Prints: Toning

Image
A few days ago, I completed a set of prints on Fomatone MG Warmtone paper. Mostly to see what this paper was like and to print another film negative made from a digital image. The negative was one I made with my Fuji GFX 50s ii digital camera then had converted to a 4x5 negative by Gammatech in the USA. This I then printed conventionally in my enlarger.  For this project I bought a pack of 10pcs of Fomatone 9.5" x 12" paper. The first sheet was for test strips and then a couple of initial prints before I had what I liked. The remaining sheets I printed at two different exposures. In general, the tail end of such a small packet of paper would not be sufficient to complete another print unless I got lucky. I also wanted to experiment with some toning of the paper so having a number of prints to play with helps me explore the toning topic more.  Toning The basic strategy I decided to pursue was some basic split toning. In general, I find toning is less chaotic than lith printi...

Film from Digital Prints: Fomatone Warmtone Paper

Image
Another print in this series of digital images made into negatives for conventional silver gelatin prints. You can find earlier incarnations here ...  Blog Post Image This time I decided to experiment with a warmtone paper. The genesis of this was that I noted, and Andrew Sanderson master printer prints exclusively on Ilford Warmtone paper. I have a bias towards neutral tone papers and developer, and I typically use Ilford MGFB Classic with a very white baryta paper base or Ilford Art 300 paper with a cotton rage paper that is slightly warm in tone. I use Moersch ECO 4812 developer which is a neutral developer on these papers.  I do not know the reasons for Andrew Sandersons choice but there are some printers that prefer a slightly warm tone and will add a barely noticeable sepia tone to a finished print. It is also possible that it provides more opportunity for toning generally. So I thought why not?  I do not have a warmtone developer however so there is a limit at this...

More 'Ma': Film from Digital Print: Part II

Image
Another print from this series that emphasizes negative space using film negatives created from a digital image.  I made a series of images on the same foggy morning on Lake Pend Oreille in Idaho. There was some ice on the lake and a shifting fog obscuring and revealing the far shore.  I find foggy images exceedingly difficult to print and there can be many interpretations of an image as a result. ( Here is an example of one such exploration of the range of a print's possibilities.) The difficulty stems from the lack of ability to manipulate the contrast using multi-grade paper. There is a limited contrast range achievable even from the highest contrast filter. The negative itself has a very compressed range of tone due to the subject matter. (This is perhaps where digital can excel however the limited range is inherent in the image and even digital can create visible quantization effects unless one is careful in post processing. ) There are other techniques to improve the con...

Sand Creek Lith Prints: Lith Prints from Digital Images

Image
This is a series of prints made from my 'Lower Sand Creek in Winter ' project that I worked on last winter. The images were taken on my Fuji GFX 50s ii digital camera using a Fuji Acros film simulation. I also restricted the cropping to Xpan (65:24) aspect ratio and I used a Tokina 70-210mm f4 zoom lens on an Olympus mount for their 35mm cameras. I further twisted the methodology by making film negatives from these digital images. (A series of blog posts here ...) I made some conventional prints in the darkroom. Now I am making some lith prints from these negatives. Some of the images work better than others as is typical with lith printing.  For this project I broke out an old batch of obscure paper from Agfa called Rapidoprint. This paper was used in newsrooms to make fast prints on a special machine. It is a single weight paper and may have incorporated developer. I first used this paper in 2015 and though very fogged it did lith reasonably well. I am using Moersch EasyLith ...

More 'Ma': Film from Digital Print

Image
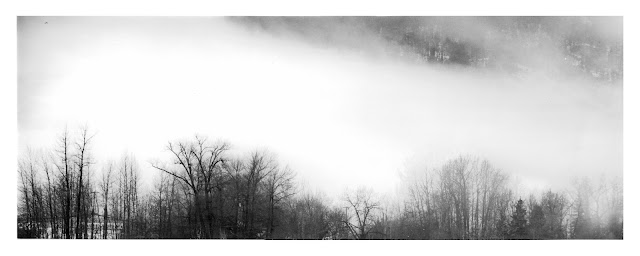
On my pursuit of negative space images, I find these are hard to plan for and one must try and be alive to the idea when they happen. This one I captured on my regular winter walks through town. I was shooting in a black and white mindset with my Fuji GFX 50s ii digital camera set to a 65:19 aspect ratio. This is my favorite setup to use. Presetting the camera in this way mimics some of my film exploits and lets the mind settle on a certain style by removing choices. Fixing the aspect ratio forces a compositional dynamic that opens up possibilities for me as much as it forces a constraint. In this case the low cloud and fog between the screen of winter trees and the mountain created this veil of mystery and lets one's mind imagine the whole scene. The screen of trees provide some tonal weight to help ground the image.  I had this image converted to a 6x7 medium format negative using the services of Gammatech. This allows me to put it in my 4x5 enlarger. I set the condensers for the...

Progress of a Print: Film from Digital

Image
I received another set of negatives from Gammatech the other day. This time I I had the negatives made on 6x7 medium format film. I was partially following my reasoning from another post on the subject where I concluded that medium format would probably yield good images at a more reasonable cost than 4x5 film. Unfortunately, I opted for 6x7 as it maximized the fit of some Xpan (65:24) aspect ratio images but I continued this onto single 4:3 aspect ratio (native Fuji GFX ratio) images and of course I cannot fit these completely in my 6x6 enlarger.  I decided to make a couple of prints cropped square anyway. The print turned out pretty well.  I started with a square 8" x 8" crop from 9 1/2" x 12" Ilford MGFB Classic paper. For some reason that I don't recall I have two unopened 50 sheet boxes of the stuff. This gives generous 3/4" borders and a large blank border on the bottom which lends a kind of balance to the print. So, I retained this 3 1/4" botto...

Drip Development

Image
I got to thinking about how to create images that incorporate this Japanese concept of 'Ma'. The idea that what isn’t visible is as important as what is. The Wikipedia entry for 'ma' gives this image by Hasegawa Tohaku as an example. It can be hard to find images that incorporate this idea so I thought how I could achieve this in the darkroom.  Pine Trees by Hasegawa Tohaku Inspiration for this process. I took a recent print... Example print of starting point. I had made and then exposed a fresh sheet of Ilford MGRC paper with this same image. I placed this exposed paper in a tray and added enough water to keep it just under the surface.  Next, I took a pipette and loaded it with about 5ml of developer (Moersch ECO 4812 1:10) and dribbled the developer over the exposed paper. In this first example I tended to focus on the first pass along the long central axis. One wants to be careful not to disturb the water bath too much as the objective is to keep the developer conce...

Framing Thunderstorm over Sandpoint

Image
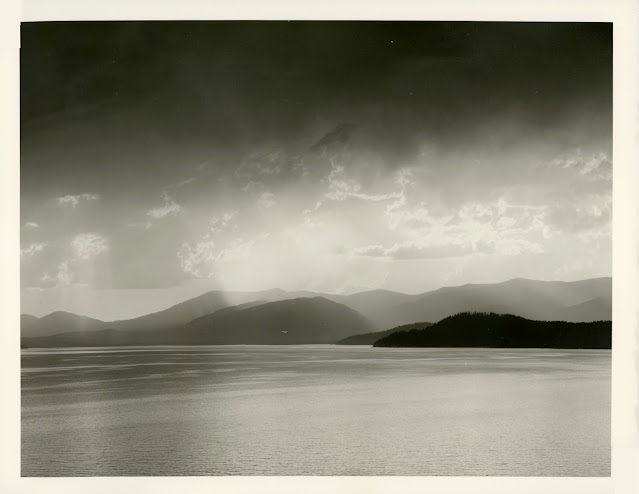
Introduction Last summer I spent a wonderful evening photographing on Lake Pend Oreille looking back at Sandpoint during a thunderstorm that was blowing over the town. I wrote about framing another print from that evening here ... As I was using my Fuji GFX digital camera then I had a large number of images to choose from. Another image I liked was taken with an Olympus 135mm f2.8 prime lens on an adapter for my GFX. This is cropped to a 35mm frame resulting in a 30 Mpixel image. Its funny but this image did not appear on my first choices for images from that evening but a subsequent look helped me understand the understated drama of this image. Blog Cover Image As I look at it now and analyze what I like about it I find the following comments. In terms of composition the light in the upper left of the sun glowing behind the clouds is balanced with some tension by the dark mass of Sunnyside peninsula in the lower right. The hint of the mountain outlines is enough to get the whole story...