Posts

Showing posts with the label The Beast

Holme Fen 4x5 Print MCC vs MGFB Paper

Image
This didn't start out as a comparison but the results of my first print I suppose made it inevitable.   I have been taking a lot of 45 photographs in the last few months. Fall and Winter seem to be the times I break out my Intrepid 4x5 and spend mornings in the local woodlands. This has left me with an itch to get back in the 'The Beast' and print some images. The Beast is my ancient Durst 4x5 enlarger I got for free. In a recent post I made some contact prints of a couple of 4x5 negatives and decided I should make larger prints. I started out with the birch trees I contacted printed earlier. That contact print was done on Ilford MGFB Classic matte paper.  Adox MCC 110 Paper I was going to cut down some 16x20" MGFB paper into 8x10 sheets but I found some Adox MCC 110 glossy FB paper so my laziness moved me to use this paper. I bought some of this paper a couple of years ago based on someone online exclaiming its deep blacks etc. The paper is good but not quite what ...
Creativity Motivation and Serendipity

Image
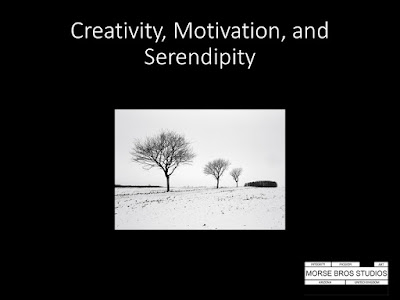
  I have created a video version of my three part blog post about a recent image I printed in the dark room. 

You guessed it! More cards.

Image
It has become a bit of a habit now. After a session in the darkroom I take my better images and make notecards with them. Originally I did this as I had offcuts and scraps that were too numerous to become mere test strips. Now I make the notecards with more intent. They are useful and make good gifts. This time around I made some on Ilford MGFB Classic paper and I cut three sheets of 12x16 paper into six 4x8" strips that I will fold in half to make 4x4" cards. My latest negative was already in 'The Beast' from yesterday's printing session. I had to raise the easel up to the lens to get an almost 1:1 image. At 3.5 inches (8.9cm) long the print is basically the same size as the 6x9cm negative. I could have contact printed it but that is a lot of trouble without a frame and I worry about handling a negative too much.  One criteria I have for cards is to make the printing simple. This means I avoid images that require a lot of dodging and burning.   Enlarger Setup It ...

Mathematical Trees 3: My third interpretation from the same negative

Image
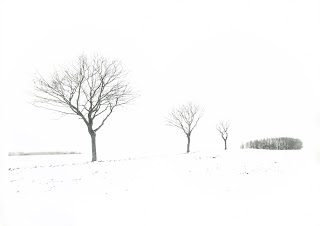
I am now on my third iteration as an exercise of looking at a single negative and finding new ways to express the image. This one like the previous is based on some serendipity during the first image making effort. I found the underexposed images had a different quality. My first take is to make a smaller image placed in the center of a large white area. Since the image is essentially surrounded by white then the whole scene might look like it is imbedded in a snowstorm with a greater feeling of isolation.  Mistaken print I used as a departure from something new. (f32 #5 8 seconds 15x9" on 12x16 Ilford MGFB Classic) For the exposure I want to keep with the hard filter (#5) as I don't want a hint of gray tones in the sky or snow. Bringing the exposure down renders the silhouettes in a grayscale which is what gives the feeling of snow or fog.  My earlier mistaken print indicates #5 at 8 seconds at f32 is about right. However, I want to reduce the image size and place it in a...

Mathematical Trees Part 2: Another interpretation from the same negative

Image
In my previous two posts I set about printing a negative I took recently. I call it Mathematical Trees as there is a kind of geometric balance to the image. It has become for me an exciting image. I think in part because it seems to be a milepost in my evolution as a photographer (and also perhaps because I have not felt creatively motivated this past month).  It is a milestone of sorts because I was not out looking for a specific image but it was immediately apparent when I saw the scene that it was a worth capturing. This does not often happen to me but it does happen with increasing frequency. I could capture the photo and composition and then realize it as a print in the darkroom. In the last post a few printing mistakes led me to consider alternative interpretations and so I will explore one of those visions here. The earlier version was a stark almost graphic take on the image. In this one I want to impart some atmosphere by darkening the sky. ...

Mathematical Trees Part 1: Where mistakes and serendipity lead...

Image
The Theme The theme of this post is how you can learn from your mistakes and not in the usual sense that you won't repeat them. Rather that there may be some creative serendipity if you contemplate the result rather than condemn it. It is also instructive in how one image may contain multiple versions that may be distinct in terms of the emotion conveyed.  Some of this was born out of some prints I made from a Marloes Sands photo where I played with contrast to get a different feel from the same image.   How it all started... In my previous post about getting back into the darkroom I printed one of the first images I took this year. I it call Mathematical Trees. I printed this on my 6x6 enlarger even though it is a 6x9 negative from my Fuji GSW690iii camera. I found a workable square crop (below) but it didn't do the image justice The copse on the right gets cut off and it is contained completely on the negative and was a vital part of the composition.  The ...

Another DIY Project: Lens Storage for the Beast

Image
I continue to have a dry-spell on my photography work. It is strange how I went from overflowing with projects and enthusiasm to to my current dry-spell. It seems to have been brought on my the COVID lockdown. I have thought perhaps I may not return but remind myself that I have spent months before and always returned with renewed energy. It will come back. In the mean time I am enjoying hanging out in my shop and reuniting with another older passion of woodworking . After I finished the shelves ( see prior post ) I had some leftover plywood and had been contemplating a problem I had with my 4x5 enlarger ‘The Beast’. The Beast is a Durst Laborator 54 enlarger. I picked this up for free and have always enjoyed it. When I picked it up it had a number of accessories. Among these are a set of 5 large condenser lenses which I had laying about the place conscious they were pretty vulnerable. The lenses are used in pairs according to the objective lens in use and size of the negative....

Printing the Holme Fen continued

Image
I started to printing again from my earlier Holme Fen images. I decided to pick up the ‘Down the Path 1’ image from earlier when I printed it on 12x16 RC paper and reprint it on fiber-based 16x20” paper. Because the photo was taken with my 6x12 SINAR Zoom film back on my Intrepid 4x5 camera so the print is 10x20”.  The paper is Adox MCC 110 variable contrast paper. I print this on ‘The Beast’ 4x5 enlarger as the negative is 12cm (5 in) wide. Original 12x16 Ilford MGIV RC Print I learned a little something about the 150mm enlarger lens on The Beast. My first test strip indicated 3 second exposure at f22 so I decided should close the aperture to f45 to stretch out the exposure! Since I started at f22 this was 2 stops difference. I made my next test print with the #00 filter at 4x (12 seconds) my best guess exposure from the test strip. It turned out very light, as if the aperture was even smaller. I readjusted to 16 seconds which I was still quite light but I decided I might li...