Posts

Showing posts with the label Oriental Seagull

Drip Development

Image
I got to thinking about how to create images that incorporate this Japanese concept of 'Ma'. The idea that what isn’t visible is as important as what is. The Wikipedia entry for 'ma' gives this image by Hasegawa Tohaku as an example. It can be hard to find images that incorporate this idea so I thought how I could achieve this in the darkroom.  Pine Trees by Hasegawa Tohaku Inspiration for this process. I took a recent print... Example print of starting point. I had made and then exposed a fresh sheet of Ilford MGRC paper with this same image. I placed this exposed paper in a tray and added enough water to keep it just under the surface.  Next, I took a pipette and loaded it with about 5ml of developer (Moersch ECO 4812 1:10) and dribbled the developer over the exposed paper. In this first example I tended to focus on the first pass along the long central axis. One wants to be careful not to disturb the water bath too much as the objective is to keep the developer conce...

2023 First Darkroom Work (Part 2): Gradient and Selective Toning

Image
The next phase of any lith printing I do tends to be toning. I never feel in control of my toning, but I manage to stumble into some interesting images as a result. Today I played with some sepia and gold toning but didn't really get anything I liked. I moved onto selenium toning as there can be some rather intense results.  Blog Post Thumbnail Image I use a 1+3 dilution of selenium which always results in strong color changes. For most of my lith the end point (to completion) of selenium toning is a rusty red almost strong sepia tone as seen below.  Wistow ORWO f11 23 sec burn sky 45 sec toned On the way to this color, it passes through a cooler almost purple tone. This led me to think about getting a combination of tones though selective toning. I have done this before, and it works well for images with a strong line like a horizon. I dip the wet print only up to the point I want toned. I try and be careful about where the toner goes. The toner effect can lag quite a bit in ...

2023 First Darkroom Work (Part 1)

Image
After much upheaval in my personal life living a semi-nomadic existence in the USA and UK I have not been in the darkroom for some time. My last effort was at the very end of May just before my move to the USA. I am back in the UK for Christmas and New Years and found some time to do some lith printing. I had to look through the back catalog to find some subjects to print.  Lith Printing Recap In many ways lith printing is easier than conventional printing. The exposure is not critical, and I learned some important techniques back in 2021 that made lith finally click for me. For instance, I meter the exposure on the easel at Ev 4 (ISO 100) in the highlight areas of the image using an incident light meter. This corresponds to about 45 seconds of exposure. I usually bracket this +/-1 stop to start with. Burning helps a lot to balance the exposure on the print. Any sky wants a stop or 2 of burn to bring the tones in line with the foreground.  I also crop out areas that are too ...

Aversley Wood Lith: To the Unknown

Image
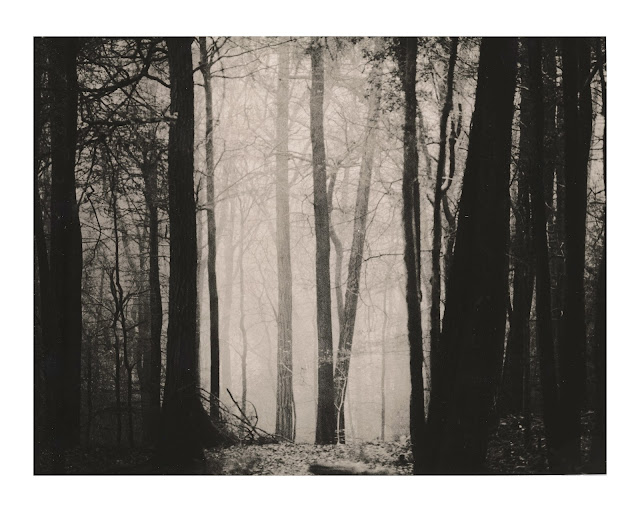
Another set of Lith prints. My last session from this set of negatives I explored as far as I could. The toning did not turn up anything interesting. This next image I have passed up for conventional printing I think because it is off balance. There is a lot of white space on the left side. It does, however, have layers in the branches in the fog and I came to think that what is there is what is not there. That the point of the white space is to suggest what is not there, the unknown.  So, I started to print and develop it with lith developer.  I measured the Ev at ISO 100 in the brushy area under the trees on the right. I set the aperture (f8) for 32 seconds at Ev of 3 which is my reference point. (Again I opened the aperture one stop to f5.6 to cut the exposure time to 16 seconds.) The bright empty area is a full stops less light on the paper so I knew some burning there would be needed.  I tried 2 stops of burn on the left at first, but this was too much so I settled...

Aversley Wood Lith: Creative Enhancements

Image
I went looking for another image in the back catalog to try some of my recent lith work on. The one I settled on was one taken on a foggy day (Fog seems to fit these techniques well where contrast manipulation is difficult with multi-grade papers.)  This one I never successfully printed. Taken across a field from the edge of the woods, the fog was so thick as to almost render the trees invisible from that distance. When I was there the edge of existence seemed compelling. In a print it amounts to a lot of white paper except for the foreground.  Scan of negative The scan above has the contrast tweaked quite a bit in curves. After composing and focusing (a grain focuser comes in real handy here) I started by setting the aperture according to my Ev (@ISO 100) of 3 rule as measured in the fog. This left the trees around Ev 4 and the field in the foreground around Ev 5. This gave me f8 for 32 seconds though most I printed at f5.6 at 16 seconds which is the same exposure but just a ...

Revisiting Wye Valley Forest: Part IV Making Small Improvements

Image
I decided to try and make some small improvements based on my project print in the previous post in this series. I had a second lith print of the same type as before. The lith development proceeded slightly further on this one making it slightly darker.  Source lith print This one I applied selenium toner on the forest floor though this time with a swab of cotton rather than the riskier soaking. The 1+3 concentration means it does not take much or long for the toner to work.  I then sepia toned the darker left and right sides about 3 minutes before giving an overall sepia tone for about a minute. The resulted in warmer tones on the sides and a neutral tone in the center.  Selenium and sepia toned version This sets the stage for iron toning.  Added Iron Toner Here is the iron toned version. The sepia toned sides still retain their warmth this time. Not too interesting. I am hoping ammonia fogging will spruce it up a bit.  Ammonia fuming This helped moderate the c...