Printing Monk's Wood: The Brothers
Introduction
As I resume my printing for this summer after a long hiatus I come to the next image I want to print. Taken in early Spring (April) the trees were just starting to leaf out at least the early ones like the blackthorn and birches. The bluebells were emerging and the grass was greening up. The canopy was quite open and many of the images are not much different than they would have been in winter.
I shot this with my Mamiya 645 medium format camera on Ilford HP5+ 400 speed film. I was experimenting with my 150mm lens which is more telephoto than I normally shoot landscapes with. I have learned a lot about this lens and have been using it more as a result.
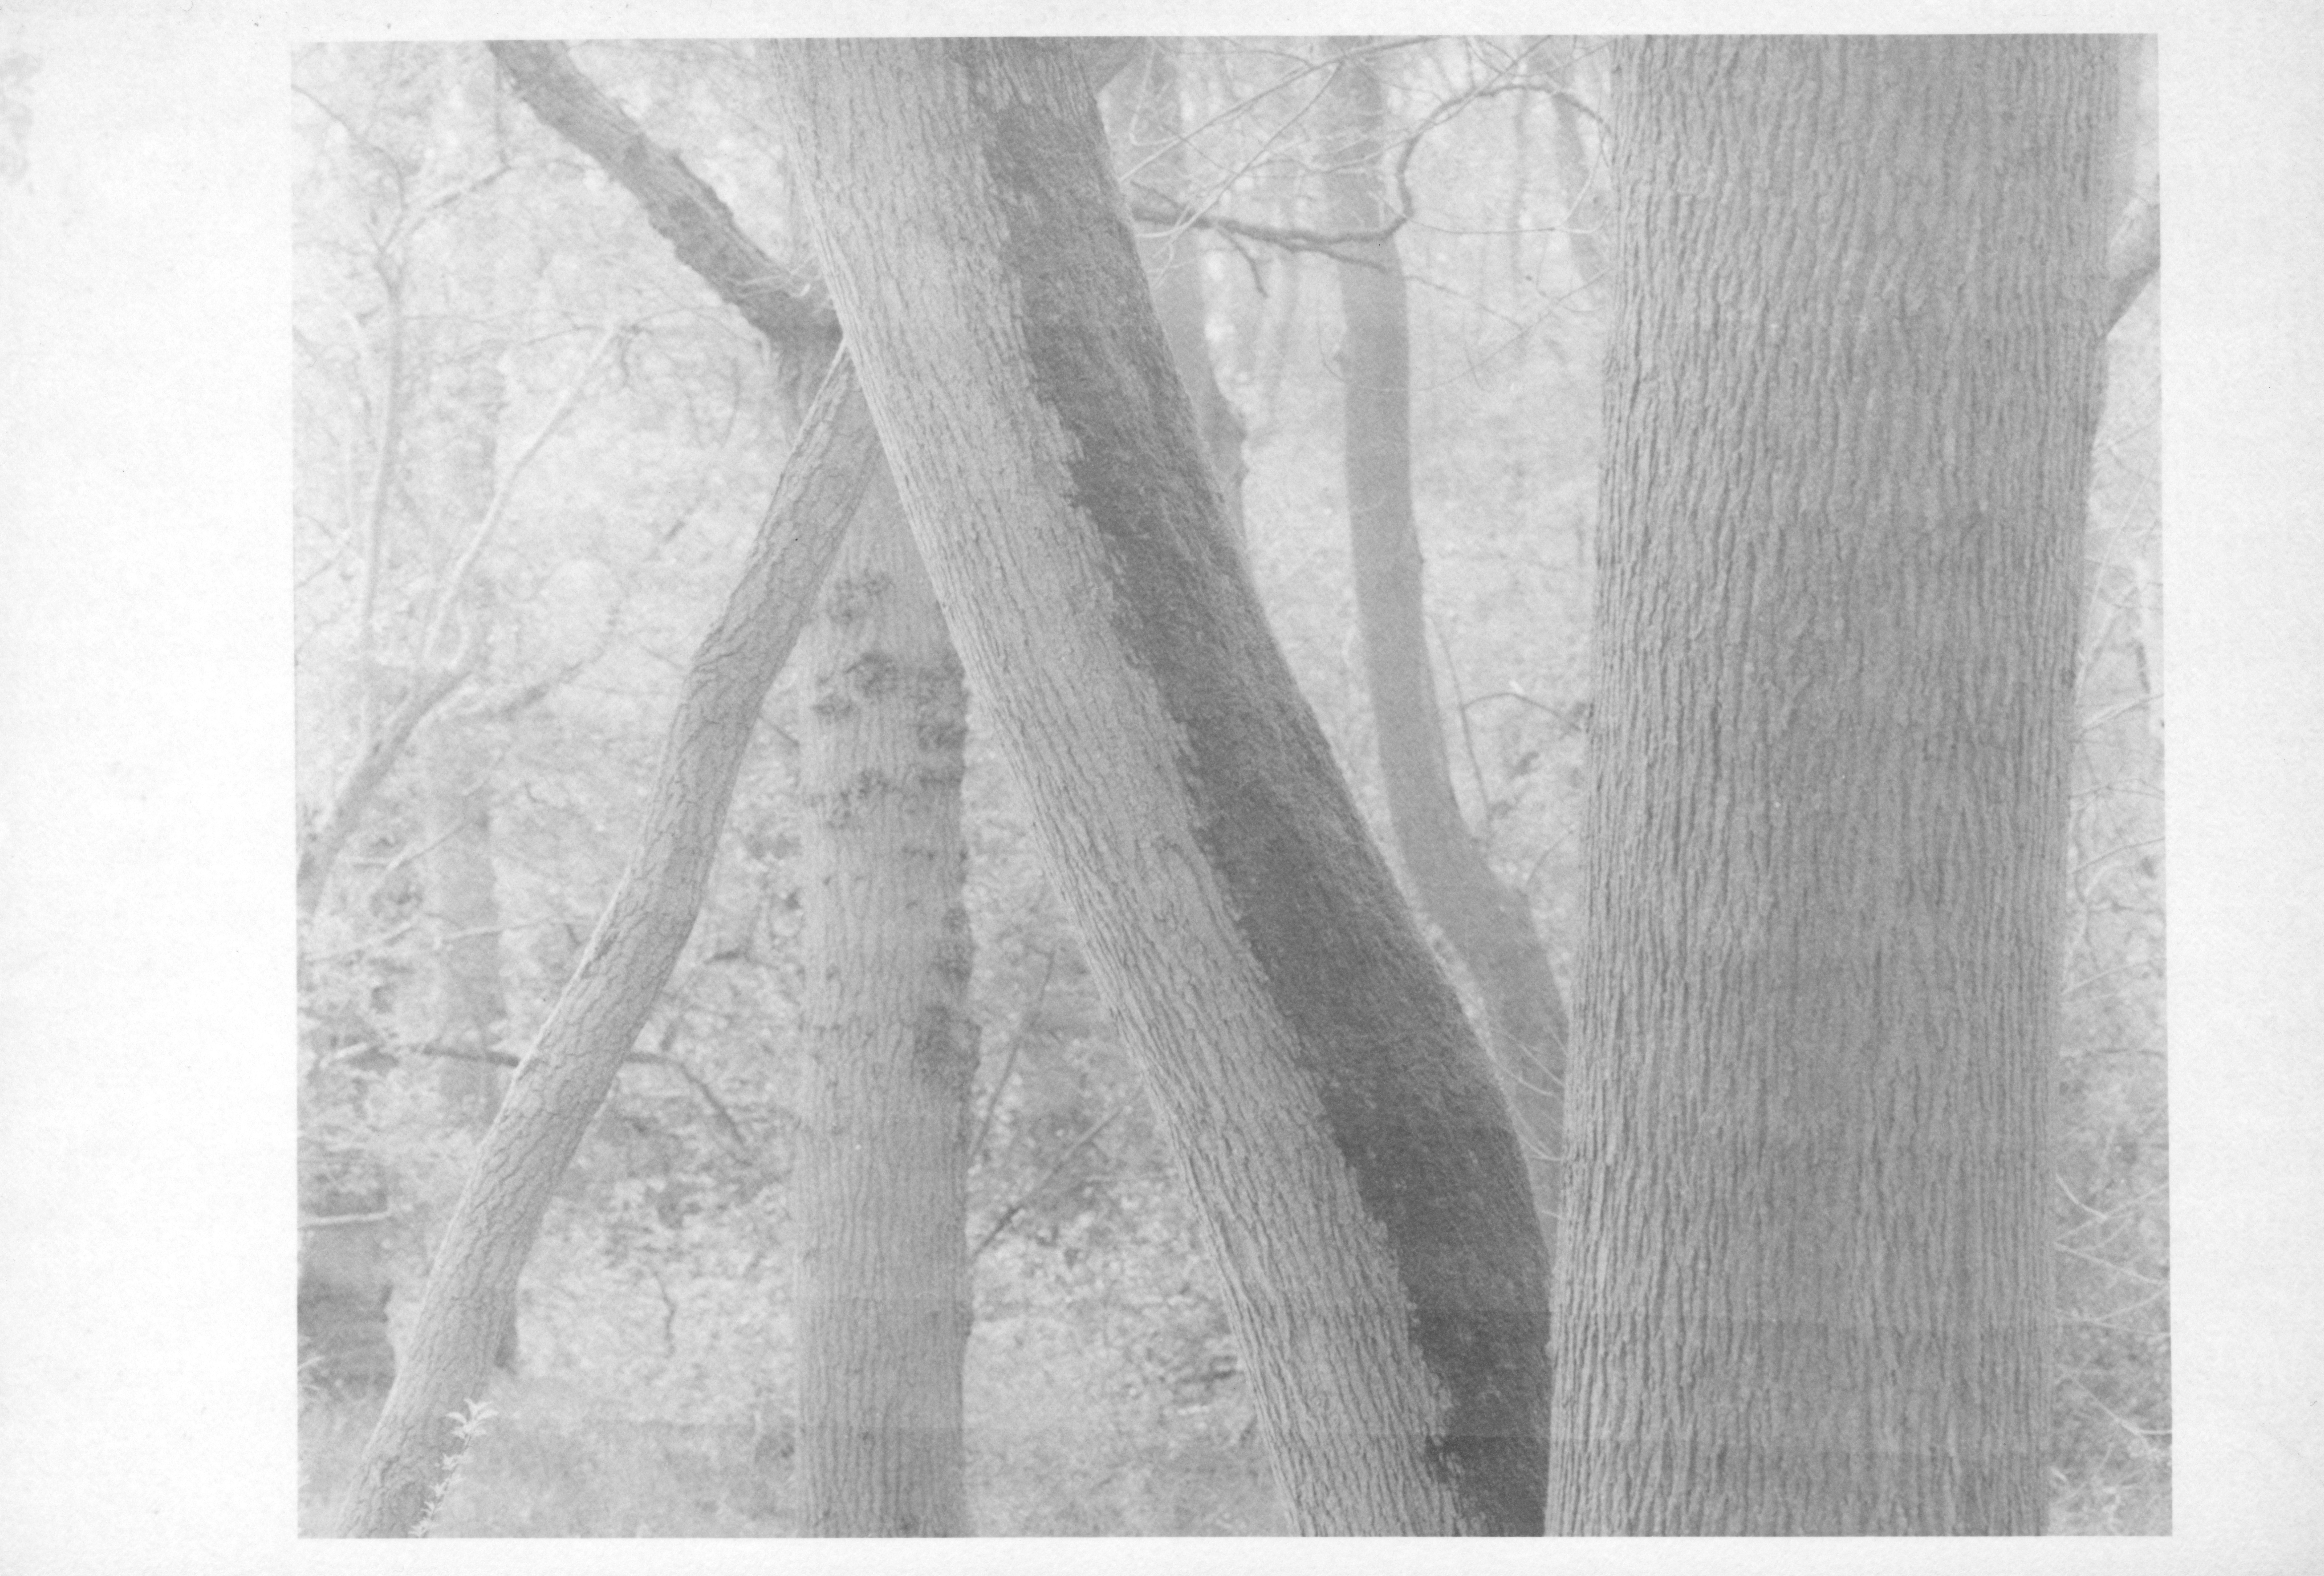
The first image I called 'The Brothers'. It came to me as a metaphor for the different trees being together for so long and being of different ages.
 |
| Blog Post Cover Image |
The Brothers
I am on a run of printing on Ilford MG ART 300 paper. A heavy cotton rag paper with a deep texture and good tonal range. It is expensive but I have really come to enjoy printing with it and the results I get. In my last run I discovered some of the paper had become fogged. I decided to use the last ones on the initial test prints to save material. I then cut some new sheets from the better paper in the box. Again I cut two 8x12 sheets from a single 16x12 sheet.
I setup and cropped the shot to fit a 7 1/2 x 9 1/2 inches. I cropped a little of the left end where a tree trunk on the left did seem to fit hence the lack of a 3:2 ratio. Initially I ran a soft filter test strip at f11 but found this very dark. I opted for another at f22 + 2 stops to get the soft filter tones in the the right range.
 |
| f22 #00 test strip |
From here I set the soft filter whole print to #00 to 32 seconds.
 |
| f22 #00 32 seconds |
This looked good for the soft filter. Some indication of burning is required on the left and right edges to balance out the image but that will come later. Next is to overlay the hard filter test strip; again at f22.
 |
| f22 #00 32 seconds #5 test strip 0 to 64 seconds |
 |
| f16 #00 16 seconds #5 test strip |
 |
| f16 #00 16 seconds #5 45 seconds |
Pretty close with this one and as I said earlier I need a burn plan for the left and right edges. There is a theory that you want the corners darker to draw the eye to the center of the photograph. It is also true that white parts of the image bleeding into the border means the distinction of the border is lost and the image suffers.
 |
| Burn plan #00 filter |
Here is the result.
 |
| Final Print f16 #00 16 seconds #5 45 seconds burn left right side 8 seconds each according to the burn plan. |
Comments