Posts

Showing posts with the label Adox MCC 110

Printing the Foggy Oak

Image
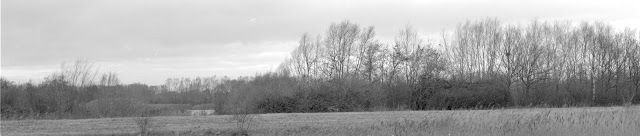
Yes another printing post. Sorry but I keep my lab notes here which makes for dreadfully boring reading. Blog post cover photo This image I took during my two days of photography in Holme Fen  when there was persistent fog for a few days. I printed this image as part of a contact print series  and decided to make an 8x10 print. This involves moving upstairs to 'The Beast' my 4x5 enlarger. I am also nearing the end of my pack of 8x10 Adox MCC 110 paper a glossy FB paper so I thought this would be a good use for it.  Looking at my notes from the last time I printed on this paper I setup for an Ev of close to 6 with the negative removed which got me to f22. My first test strip was too dark so I switched to f32. Given my contact print experience and experience with fog in the past I opted for a #5 hard filter only print.  Test Strip (#5 hard filter) (8, 11, 16, 22, 32, 45, 64 seconds right to left.) The test print caused some confusion as I could not decide between 22...

Holme Fen 4x5 Print MCC vs MGFB Paper

Image
This didn't start out as a comparison but the results of my first print I suppose made it inevitable.   I have been taking a lot of 45 photographs in the last few months. Fall and Winter seem to be the times I break out my Intrepid 4x5 and spend mornings in the local woodlands. This has left me with an itch to get back in the 'The Beast' and print some images. The Beast is my ancient Durst 4x5 enlarger I got for free. In a recent post I made some contact prints of a couple of 4x5 negatives and decided I should make larger prints. I started out with the birch trees I contacted printed earlier. That contact print was done on Ilford MGFB Classic matte paper.  Adox MCC 110 Paper I was going to cut down some 16x20" MGFB paper into 8x10 sheets but I found some Adox MCC 110 glossy FB paper so my laziness moved me to use this paper. I bought some of this paper a couple of years ago based on someone online exclaiming its deep blacks etc. The paper is good but not quite what ...

16" x 20" Print Drying and Flattening

Image
Probably the biggest hassle of printing on fiber-based paper is how to flatten a print. I went through this conundrum a number of years ago and settled on something that works for me. I started with an  8x10 version and then made a 12x16 version . This method was adopted by at least one commercial outfit Cahute who is doing portraits  (though I get flat prints in about a day not two). Cahute also uses two sheets of acrylic with the print clamped between them after drying for storage until they are mounted. This is a nice extra as despite the best efforts the differential absorption of moisture between the emulsion and the paper back means there is a tendency for the print to slightly curl over time. Without this technique I have not had a problem mounting the prints however. As for drying time I find that it usually takes an all day session before I have one print I am happy with. If I expect to have to dry more than one I make more setups like this. They are relativel...

Framing the 'Very Wide Panoramas:5:1 Aspect Ratio Project'

Image
A little whole back I posted about an experiment I tried using 35mm film in my SINAR Zoom 6x12 film back on my large format camera. The idea was a success however I really wanted to print and mount a photo from this to discern the real impact. I do like to photograph and scan my work but I get the most satisfaction from printing the work and making it presentable. In this case I got to combine a few different ideas I have had over the years. Printing I started out with one of my test images. The first one I chose did not have enough interest for me when I made a test print. First Choice I went to the other version which was taken with a wider angle lens and held more interest in the foreground. Apologies for these scans as they are not the best. In particular the shadows are blocked up. (The print is much better!) Final Selection The largest easel I have is 16x20 and I chose Adox MCC 110 paper. It is a variable contrast fiber-based paper. I have only recently begun ...

Printing the Holme Fen continued

Image
I started to printing again from my earlier Holme Fen images. I decided to pick up the ‘Down the Path 1’ image from earlier when I printed it on 12x16 RC paper and reprint it on fiber-based 16x20” paper. Because the photo was taken with my 6x12 SINAR Zoom film back on my Intrepid 4x5 camera so the print is 10x20”.  The paper is Adox MCC 110 variable contrast paper. I print this on ‘The Beast’ 4x5 enlarger as the negative is 12cm (5 in) wide. Original 12x16 Ilford MGIV RC Print I learned a little something about the 150mm enlarger lens on The Beast. My first test strip indicated 3 second exposure at f22 so I decided should close the aperture to f45 to stretch out the exposure! Since I started at f22 this was 2 stops difference. I made my next test print with the #00 filter at 4x (12 seconds) my best guess exposure from the test strip. It turned out very light, as if the aperture was even smaller. I readjusted to 16 seconds which I was still quite light but I decided I might li...