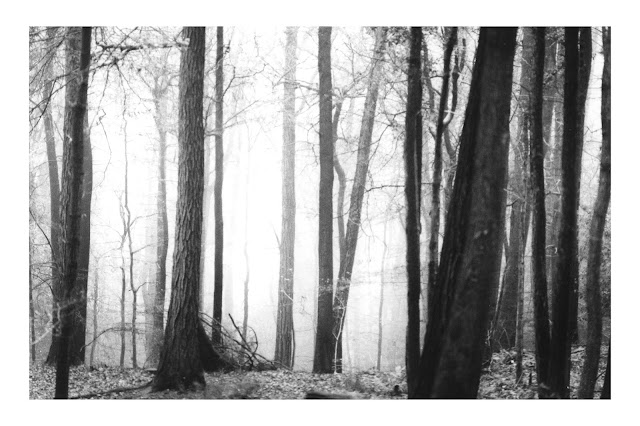
Wye Forest no2 Print
The Wye forest series is from a short trip to the Wye valley on a foggy day. Since the primary purpose was a walk I was shooting my Mamiya 645 handheld and HP5+ pushed to 800. The result was some very soft images due to the wide aperture, the fog, and film grain.
The prints are a challenge as a result. This was another exploration of the range of possible prints that lead me eventually to a different image than I would have settled on if I had proceeded in my usual fashion.
I started out with test strips and my first test print of a #00 filter at 8 seconds and #5 filter 8 to 64 seconds in half stops.
This lead me to the first print at #00 at 11 seconds and #5 22 seconds. This is more or less what I was after. The darker tree trunks are a little too dark and so another print (4) I reduce the #00 filter to 8 seconds and have a better version.
 |
| Print 1 #00 11 seconds and #5 22 seconds |
 |
| Print 4 |
Exploring by 'Going Too Far'
So much for the conventional direction. I ‘go too far’ next and print both exclusively the hard and soft filter at 32 seconds in each. The high contrast versions is not great but the low contrast version has much more detail in the distance and surprises me as I tend to like more contrast in an image.
 |
| Print 2 30 seconds #5 filter (High contrast) |
 |
| Print 3 30 seconds #00 filter |
 |
| Print 5 #00 16 seconds #5 16 seconds |
 |
| Print 6 #00 30 seconds 1 1/2 minutes development |
 |
| Print 7 #5 11 seconds #00 32 seconds develop about 1 minutes |
 |
| Low contrast version 3, 6, and 7 |
Conclusions
There are different interpretations of this image. The first higher contrast version has that bright glow of a foggy morning. Much is obscured in the depth of the fog in this version and so is left to the imagination. The eye is eventually drawn to the foreground.
In the lower contrast version the eye stays in the background.
I am also interested now in a lower key version of the low contrast image.
Selenium and Sepia Toning
Printing Details
150W, 1xND, f16, Ilford MGFB Classic
Test Print
- #00 8 sec
- #5 test
- #00 11 sec
- #5 22 sec
- #00 0 sec
- #5 32 sec
- #00 32 sec
- #5 0 sec
- #00 8 sec
- #5 22 sec
- #00 16 sec
- #5 16 sec
- #00 32 sec
- #5 0 sec
- Pull early from dev about 1:30 instead of 3:00
- #00 32 sec
- #5 11 sec
- Pull early from dev about 1:00 instead of 3:00

Comments