The journey through the darkroom continues. My
recent upgrades to make 16"x20" prints has been very
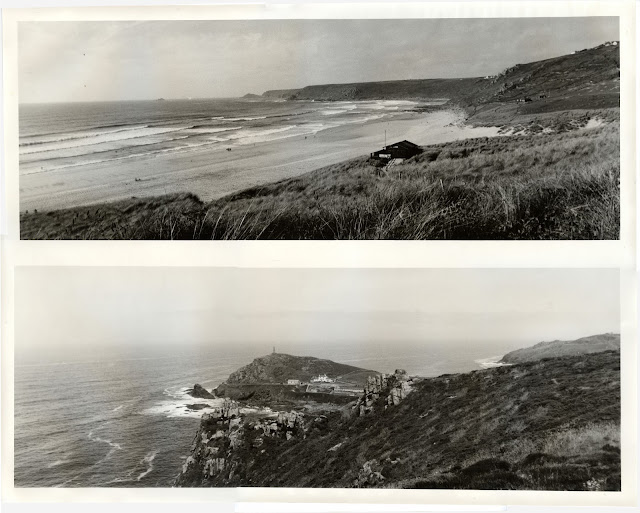
satisfying and illuminating. During my first printing work at this scale I became aware that the focus at the edge of the print was not as clear as at the center. Prior to this scale of printing I had not noticed. This is for two reasons 1) My biggest prints were 12x16" prints, 2) I used fast modern papers in this size. When you move up to larger prints you need longer exposures for the same f-stop and my first 16x20" paper was some old
Negra Portrene which is a slower emulsion than the modern Ilford paper that I used in the past. Consequently the
dual panorama print referenced above was printed at f5.6 at 16" and 32". This lead to the observation of softness at the edge.
 |
| 16x20" print on Negra Portrene f5.6 | |
If one zooms into the upper photo at lower right corner and the lower middle, one can easily see the softness expressed at the edge of the lens. The lens I use is a 75mm f3.5 lens from an old Zeiss folding camera. ( All prints were focused in the center using a grain focuser.)
 |
Middle center showing much sharper image. (400dpi) Negra Portrene f5.6 32 seconds
Camera lens |
 |
Lower right corner zoom showing edge softness of image.(400dpi) Negra Portrene f5.6 32 seconds
Camera lens |
This difference showed clearly the shortcomings of my low budget darkroom. First I probably needed a better lens, and should also stop down the lens more. (To stop down to f16 3 stops, for the above print my exposure would have gone to 256 seconds.)
I bought a Schneider Comparon lens on the name alone and without any research. Testing showed it to be substantially better. Subsequent research however showed this was a low-end lens and what I wanted was a 6 element lens (Componon in Schneider-speak). Also Nikon and Rodenstock are good lenses but again with Rodenstock they make good and mediocre lenses. Testing also revealed that stopping the lens down showed marked improvements.This has the drawback of very long exposures. Even on Ilford MGIV RC paper at f22 exposures went to 360 minutes! Sharper images but one must be awfully patient.
 |
| Right edge zoom Schneider Comparon f22 360 second exposure (400 dpi) Ilford MGIV RC |
At some point I also learned that my Meopta 6 enlarger has a 75 watt bulb but can take up to 150 watts. This change would allow me to push up to higher f-stops and keep the exposure times down. This is seen below when I reprinted the image at f16 for 45 seconds which would have been 256 seconds with the old lens and 75 watt bulb. (An interesting effect I noticed when changing lenses is that a given f-stop on the old lens did not produce the same exposure on the Schneider. I was puzzled by this and would love to have it explained. This seems to be part of the reason why a doubling of light bulb wattage seemed to have about 2.5 stops difference in the exposure. Incandescent bulbs get more efficient at higher wattage. In other word their brightness increases disproportionately with wattage. For instance
one website shows a 75 watt bulb producing 1,100 lumens while a 150 watt bulb will produce 2,600 lumens. This is about 1.25 stops )
 |
| Right edge zoom Schneider Comparon f16 45 second 150 watt bulb (400dpi) Negra Portrene |
I have also since bought a proper 6 element 75mm f4 Nikon lens.
Future Changes
The next areas to work on are to better stabilize my enlarger and re-check the alignment. The stand I built makes it it easier to induce vibrations when changing filters etc. I have to be vigilant to let it dampen out before making an exposure. It would be better to make it stiffer. I will also look more closely at the alignment of the plane of the lens and the easel.
David Kachel has some good notes on these subjects and others for those interested in exploring further.


Comments